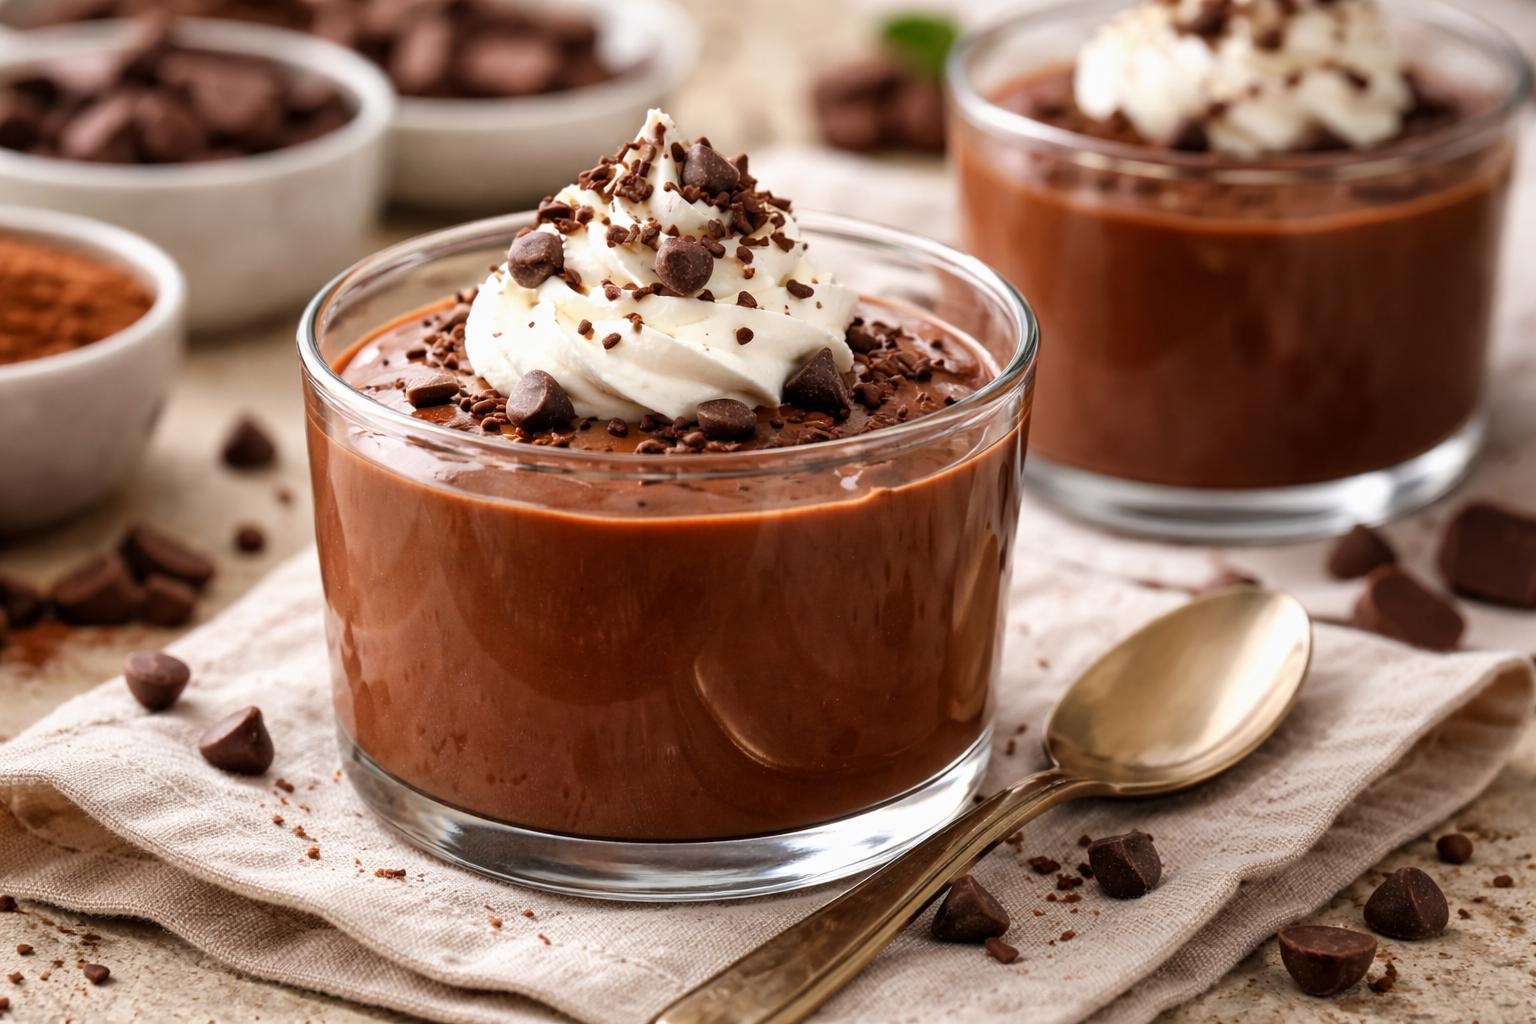
Chocolate Pudding Cups are individual servings of smooth, creamy chocolate pudding layered or served in small dessert cups. Made with simple pantry ingredients like cocoa powder, milk, sugar, and cornstarch, this homemade dessert has a rich chocolate flavor and a silky, spoonable texture.
Unlike instant pudding mixes, homemade chocolate pudding is cooked on the stovetop, allowing the ingredients to come together into a naturally thick and creamy dessert. Serve it chilled with whipped cream, chocolate shavings, or fresh berries for an easy treat that works well for family desserts, parties, holidays, and make-ahead gatherings.
Recipe Overview
| Detail | Information |
|---|---|
| Prep Time | 10 minutes |
| Cook Time | 10 minutes |
| Chilling Time | 2 hours |
| Total Time | 2 hours 20 minutes |
| Servings | 6 cups |
| Difficulty | Easy |
Why You’ll Love This Recipe
-
Simple ingredients: You only need everyday baking and refrigerator staples.
-
Rich chocolate flavor: Cocoa powder and semisweet chocolate create a deeper chocolate taste.
-
Make-ahead friendly: Prepare the pudding several hours before serving.
-
Smooth and creamy: Cornstarch helps create a thick, spoonable consistency.
-
Easy to customize: Add whipped cream, chocolate curls, crushed cookies, or fresh fruit.
Ingredients
Makes 6 small dessert cups.
-
2 ½ cups whole milk
-
½ cup heavy cream
-
½ cup granulated sugar
-
¼ cup unsweetened cocoa powder
-
3 tablespoons cornstarch
-
¼ teaspoon salt
-
3 ounces semisweet chocolate, finely chopped
-
2 tablespoons unsalted butter
-
1 teaspoon vanilla extract
Optional toppings:
-
1 cup whipped cream
-
Chocolate shavings
-
Mini chocolate chips
-
Crushed chocolate sandwich cookies
-
Fresh strawberries or raspberries
Ingredient Notes
Whole milk: Whole milk gives the pudding a creamy consistency. Lower-fat milk can work, although the finished pudding may be slightly less rich.
Unsweetened cocoa powder: Natural or Dutch-process cocoa powder can be used. Dutch-process cocoa generally produces a smoother, deeper chocolate flavor.
Semisweet chocolate: Chopped semisweet chocolate melts into the warm pudding and adds richness. Chocolate chips can also work, but chopped baking chocolate usually melts more smoothly.
Cornstarch: This is the thickening ingredient. Measure it carefully to avoid making the pudding overly firm.
Heavy cream: Adds richness and creates a creamier mouthfeel.
How to Make Chocolate Pudding Cups
1. Combine the dry ingredients
In a medium saucepan, whisk together the granulated sugar, cocoa powder, cornstarch, and salt.
Gradually pour in about ½ cup of the milk, whisking until the mixture becomes a smooth paste without visible lumps.
2. Add the remaining milk and cream
Slowly whisk in the remaining 2 cups of milk and the heavy cream.
Continue whisking until everything is evenly combined.
3. Cook the pudding
Place the saucepan over medium heat.
Cook for approximately 6–9 minutes, whisking frequently, especially around the edges and bottom of the pan.
As the mixture heats, it will gradually thicken. Once it reaches a gentle boil, continue cooking for about 30–60 seconds while whisking constantly.
The pudding should look glossy and thick enough to coat the back of a spoon.
4. Add chocolate and butter
Remove the saucepan from the heat.
Add the chopped semisweet chocolate and butter. Whisk until both have completely melted and the pudding looks smooth.
Stir in the vanilla extract.
5. Fill the dessert cups
Divide the warm pudding evenly among six small serving cups or ramekins.
For a smooth surface, gently tap each cup against the counter to release any large air bubbles.
6. Chill until set
Place a piece of plastic wrap directly against the surface of each pudding portion to prevent a skin from forming.
Refrigerate for at least 2 hours, or until the pudding is thoroughly chilled and set.
7. Add toppings and serve
Remove the plastic wrap before serving.
Top each chocolate pudding cup with whipped cream, chocolate shavings, or your favorite toppings.
Serve cold.
Expert Tips
-
Whisk the cocoa mixture first: Mixing the dry ingredients with a little milk creates a smooth paste and helps prevent cocoa lumps.
-
Use medium heat: Excessively high heat can cause uneven cooking and scorching.
-
Keep whisking: Cornstarch can settle and stick to the bottom of the saucepan if left unattended.
-
Add chocolate off the heat: This allows the chocolate to melt gently without overheating.
-
Cover the surface: Pressing plastic wrap directly against the pudding prevents a thick skin from forming.
-
Allow enough chilling time: The pudding thickens further as it cools, so avoid judging its final consistency while still hot.
Common Mistakes to Avoid
1. Adding all the milk too quickly
Adding the milk gradually to the cocoa and cornstarch mixture helps prevent lumps.
2. Cooking over high heat
High heat can scorch the milk and create an unpleasant cooked flavor. Use medium heat and stir regularly.
3. Not cooking the cornstarch long enough
The pudding may remain thin if it does not reach a gentle boil. Follow the cooking instructions and whisk continuously.
4. Overusing cornstarch
Too much cornstarch can produce a stiff, gummy pudding instead of a creamy dessert. Measure the amount accurately.
5. Skipping the chilling step
Warm pudding is softer and less set. Give it enough time in the refrigerator before serving.
Easy Variations
Chocolate Oreo Pudding Cups
Add a layer of crushed chocolate sandwich cookies to the bottom of each cup before filling it with pudding. Finish with whipped cream and additional cookie crumbs.
Chocolate Peanut Butter Pudding Cups
Whisk 2 tablespoons of creamy peanut butter into the warm pudding after removing it from the heat. The result will have a subtle peanut butter flavor.
Dark Chocolate Pudding Cups
Replace the semisweet chocolate with dark chocolate containing approximately 60–70% cocoa for a more intense chocolate flavor.
Chocolate Strawberry Pudding Cups
Add a layer of sliced fresh strawberries between the pudding and whipped cream. The fruit adds freshness and a pleasant contrast to the chocolate.
Layered Chocolate Pudding Cups
Alternate layers of chocolate pudding, crushed cookies, and whipped cream in clear dessert cups for an attractive layered presentation.
Ingredient Substitutions
| Ingredient | Substitute | Expected Difference |
|---|---|---|
| Whole milk | 2% milk | Slightly less creamy |
| Heavy cream | Additional whole milk | Less rich |
| Semisweet chocolate | Dark chocolate | More intense flavor |
| Unsalted butter | Salted butter | Slightly saltier taste |
| Granulated sugar | Light brown sugar | Mild caramel-like flavor |
| Dairy milk | Unsweetened oat milk | Different flavor and potentially softer texture |
For dairy-free pudding, use suitable plant-based milk and dairy-free chocolate and butter alternatives. The final consistency may vary depending on the milk used.
What to Serve With Chocolate Pudding Cups
Chocolate pudding cups are satisfying on their own, but a few simple additions can make them more interesting.
-
Fresh strawberries: Their slight tartness balances the chocolate.
-
Raspberries: Add a fruity contrast to the creamy pudding.
-
Shortbread cookies: Provide a buttery, crisp texture.
-
Vanilla wafers: Make a simple crunchy accompaniment.
-
Whipped cream: Adds a light, airy topping.
-
Coffee or hot chocolate: A warm drink pairs nicely with a chilled chocolate dessert.
Storage & Reheating
Refrigerator: Store chocolate pudding cups covered in the refrigerator for up to 3 days. Keep them chilled until serving.
Freezing: Freezing is not recommended because the pudding can become grainy or watery after thawing.
Reheating: These pudding cups are intended to be served cold. Reheating is generally unnecessary. If the pudding becomes too firm, gently stir an individual portion before serving.
Make-ahead preparation: Prepare the pudding up to 2 days in advance. Keep it covered and add whipped cream, cookies, or fresh fruit just before serving for the best presentation.
Frequently Asked Questions
1. Can I make chocolate pudding cups the night before?
Yes. Chocolate pudding cups are an excellent make-ahead dessert. Prepare them the night before, cover each cup, and refrigerate. Add whipped cream and other toppings shortly before serving.
2. Why is my homemade chocolate pudding lumpy?
Lumps can develop when cornstarch is not fully dissolved or when the mixture is not whisked consistently during cooking. Mixing the dry ingredients with a small amount of milk before adding the rest helps prevent this problem.
3. How do I know when chocolate pudding is thick enough?
The pudding should become glossy and noticeably thicker as it cooks. It should coat the back of a spoon and leave a visible trail when you run a finger across the coated surface.
4. Can I use chocolate chips instead of chopped chocolate?
Yes. Semisweet chocolate chips can replace chopped chocolate in the same weight. Whisk until they are completely melted and the pudding is smooth.
5. Can I make chocolate pudding cups without heavy cream?
Yes. Replace the heavy cream with an equal amount of whole milk. The pudding will still thicken because of the cornstarch, although it will have a slightly lighter consistency.
6. How do I keep pudding from forming a skin?
Press plastic wrap directly against the surface of the warm pudding before refrigerating. This limits air exposure and helps prevent a skin from developing.
Final Thoughts
Homemade Chocolate Pudding Cups are a simple way to serve a classic chocolate dessert without complicated preparation. The stovetop pudding comes together with basic ingredients, and individual cups make serving easy. Finish with whipped cream, fresh berries, or chocolate shavings for a dessert that can be prepared ahead of time and enjoyed straight from the refrigerator.
Leave a Reply