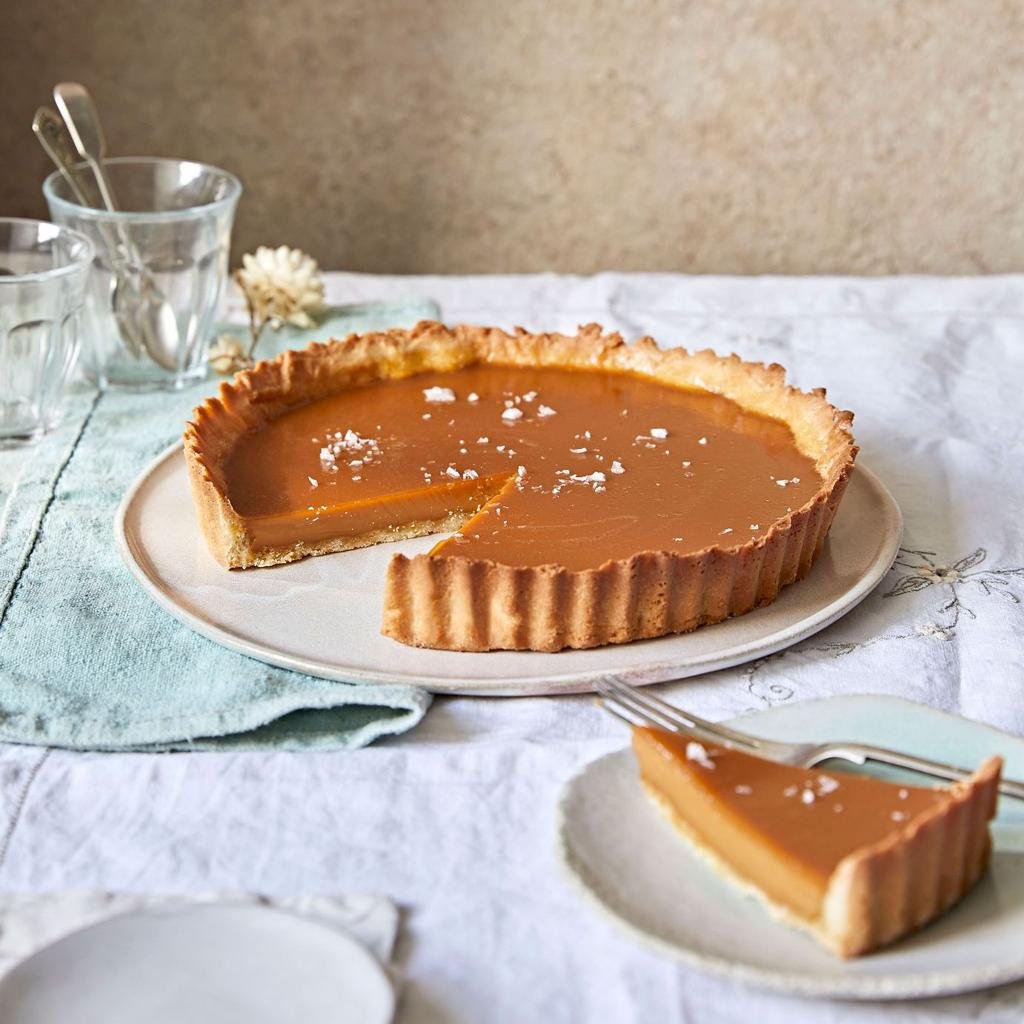
A salted caramel tart is a rich, elegant dessert made with a crisp buttery pastry crust and a smooth, golden caramel filling finished with a sprinkle of flaky sea salt. The contrast between sweet caramel, buttery pastry, and delicate salt creates a balanced dessert with plenty of texture and flavor.
This homemade salted caramel tart is ideal for dinner parties, holiday gatherings, special occasions, or whenever you want a dessert that looks impressive without requiring complicated decorating. The filling sets into a soft, sliceable caramel layer, while the pastry shell provides a crisp base in every bite.
Recipe Overview
- Prep Time: 35 minutes
- Cook Time: 30 minutes
- Chilling Time: 3 hours
- Total Time: Approximately 4 hours 5 minutes
- Servings: 10 slices
- Difficulty: Intermediate
Why You’ll Love This Recipe
- Rich caramel flavor: Homemade caramel has a deep buttery sweetness balanced with salt.
- Crisp pastry crust: A sweet shortcrust pastry provides a sturdy, buttery foundation.
- Make-ahead friendly: The tart needs time to chill, making it convenient to prepare before guests arrive.
- Beautiful presentation: Its glossy caramel filling and delicate salt topping look elegant without elaborate decoration.
- Great for special occasions: Serve it for holidays, celebrations, or as a dinner-party dessert.
Ingredients
For the Pastry Crust
- 1 ¼ cups (155 g) all-purpose flour
- ½ cup (113 g) unsalted butter, cold and cubed
- ¼ cup (30 g) powdered sugar
- 1 large egg yolk
- 2 tablespoons cold water, as needed
- ¼ teaspoon salt
For the Salted Caramel Filling
- 1 cup (200 g) granulated sugar
- 6 tablespoons (85 g) unsalted butter, cut into pieces
- ½ cup (120 ml) heavy cream, slightly warmed
- 1 teaspoon vanilla extract
- ¾ teaspoon fine sea salt, or to taste
For Finishing
- ½–1 teaspoon flaky sea salt
Ingredient Notes
Butter: Use unsalted butter so you can control the salt level in both the pastry and caramel.
Heavy cream: Heavy whipping cream with approximately 36% milk fat gives the caramel a rich, smooth consistency. Avoid substituting milk, which can make the filling thinner.
Sea salt: Fine sea salt works well inside the caramel. Flaky sea salt is best for the finishing touch because it adds small, delicate bursts of saltiness.
Granulated sugar: Regular white granulated sugar is suitable for making the caramel. Avoid replacing it with powdered or brown sugar.
How to Make Salted Caramel Tart
1. Prepare the Pastry Dough
Add the flour, powdered sugar, and salt to a mixing bowl. Add the cold butter and rub it into the dry ingredients until the mixture resembles coarse breadcrumbs.
Mix in the egg yolk. Add cold water gradually, just until the dough comes together. Avoid adding too much water, as this can make the pastry tough.
Shape the dough into a flat disc, wrap it, and refrigerate for at least 30 minutes.
2. Shape the Tart Crust
Preheat your oven to 350°F (175°C).
Roll the chilled dough on a lightly floured surface into a circle large enough to line a 9-inch tart pan with a removable bottom.
Gently press the pastry into the base and sides of the pan. Trim the excess dough and prick the bottom lightly with a fork.
Refrigerate the lined tart shell for another 15 minutes to help it hold its shape during baking.
3. Blind Bake the Crust
Line the pastry with parchment paper and fill it with pie weights or dried beans.
Bake for approximately 15 minutes. Carefully remove the parchment and weights, then bake for another 10–12 minutes until the base looks dry and the edges are lightly golden.
Allow the crust to cool completely before adding the caramel.
4. Make the Salted Caramel
Place the granulated sugar in a medium, heavy-bottomed saucepan over medium heat.
Allow the sugar to melt, gently swirling the pan occasionally. Avoid stirring vigorously. The sugar will gradually liquefy and develop an amber color.
Once the caramel reaches a deep golden amber shade, carefully add the butter. Stir until incorporated.
Slowly pour in the slightly warmed heavy cream while stirring continuously. The mixture will bubble vigorously, so add the cream carefully and keep your hands and face away from the pan.
Continue stirring over low heat until the caramel becomes smooth. Remove from the heat and mix in the vanilla extract and fine sea salt.
Let it cool for approximately 10–15 minutes, until slightly thickened but still pourable.
5. Fill the Tart Shell
Pour the warm caramel into the cooled pastry crust. Spread it gently so the filling reaches the edges and forms an even layer.
Allow the tart to cool at room temperature briefly before transferring it to the refrigerator.
6. Chill and Finish
Refrigerate the tart for approximately 2–3 hours, or until the caramel is set enough to slice cleanly.
Just before serving, sprinkle flaky sea salt over the surface.
Carefully remove the tart from its pan, cut into slices with a sharp knife, and serve.
Expert Tips
- Use cold butter for the pastry: This helps create a tender, crisp crust rather than a dense one.
- Watch the caramel color: Remove the sugar from the heat when it reaches a deep amber shade. Caramel can go from properly colored to burnt quickly.
- Warm the cream slightly: This reduces the temperature difference when adding it to the hot caramel.
- Let the crust cool: Adding caramel to a hot pastry shell can affect the filling’s setting.
- Allow enough chilling time: Cutting the tart too early may cause the caramel to spread instead of holding its shape.
- Use a sharp knife: Wipe the blade between slices for cleaner portions.
Common Mistakes to Avoid
- Overbaking the pastry: A very dark crust can taste bitter. Remove it when golden and fully baked.
- Burning the sugar: Keep the heat moderate and watch the color carefully.
- Adding cold cream too quickly: The temperature difference can cause vigorous bubbling and splattering.
- Using too much salt: Start with the recommended amount, then adjust according to taste.
- Skipping refrigeration: The caramel needs time to become firm enough for neat slices.
Easy Variations
- Chocolate salted caramel tart: Add a thin layer of melted dark chocolate to the cooled pastry shell before pouring in the caramel. Allow the chocolate to set first.
- Chocolate drizzle: Finish the chilled tart with a light drizzle of melted dark chocolate.
- Nutty caramel tart: Sprinkle chopped toasted pecans or hazelnuts over the caramel before chilling.
- Extra vanilla flavor: Add a little additional vanilla extract to the caramel for a warmer flavor.
Ingredient Substitutions
- Unsalted butter: Salted butter can be used in the crust and filling, but reduce the added salt.
- Powdered sugar: Superfine granulated sugar can work in the pastry, although the texture may be slightly different.
- Heavy cream: Heavy whipping cream is interchangeable with heavy cream. Lower-fat milk is not recommended.
- Flaky sea salt: Coarse finishing salt can be used sparingly, but avoid large crystals that may be unpleasant to bite into.
What to Serve With Salted Caramel Tart
This tart is rich, so simple accompaniments work best.
- Fresh berries: Strawberries or raspberries add freshness and a slightly tart contrast.
- Vanilla ice cream: A small scoop pairs nicely with the buttery caramel.
- Whipped cream: Lightly sweetened whipped cream balances the richness.
- Fresh coffee: Black coffee or espresso provides a pleasant contrast to the sweet filling.
Storage & Reheating
Refrigerator: Store the tart covered in an airtight container or under a cake cover in the refrigerator for up to 5 days.
Freezing: The tart can be frozen, although the pastry may lose some crispness after thawing. Wrap individual slices securely and freeze for up to 1 month for best quality. Thaw overnight in the refrigerator.
Serving: This dessert is best served chilled or after sitting at room temperature for approximately 10–15 minutes.
Reheating: Reheating is generally unnecessary. Warm temperatures can soften the caramel and make the tart difficult to slice.
Frequently Asked Questions
1. Why is my salted caramel tart runny?
The caramel may not have cooked long enough, or the tart may not have chilled sufficiently. Allow the filling to cool and refrigerate the tart for at least 2–3 hours before slicing.
2. Can I make salted caramel tart ahead of time?
Yes. You can prepare it a day before serving. Keep it covered in the refrigerator and add the flaky sea salt shortly before serving.
3. Do I need a tart pan with a removable bottom?
It is strongly recommended because it makes removing and presenting the tart much easier. A regular pie dish can work, but individual slices may be harder to remove neatly.
4. Can I use store-bought pastry?
Yes. A ready-made sweet pastry shell can save preparation time. Bake it according to its package instructions before adding the caramel.
5. How do I know when the caramel is ready?
The sugar should have melted completely and developed a deep amber color. After adding the butter and cream, the mixture should become smooth and slightly thickened.
6. Can I make salted caramel tart without flaky sea salt?
Yes. Fine sea salt can be used for both the filling and topping. However, flaky salt provides a more noticeable finishing texture.
Final Thoughts
Salted caramel tart combines a crisp buttery pastry shell with a rich, smooth caramel filling and a delicate salty finish. Give it enough time to chill, add the flaky sea salt just before serving, and pair it with fresh berries or a little whipped cream for a lovely dessert that can be prepared ahead of time.
Leave a Reply