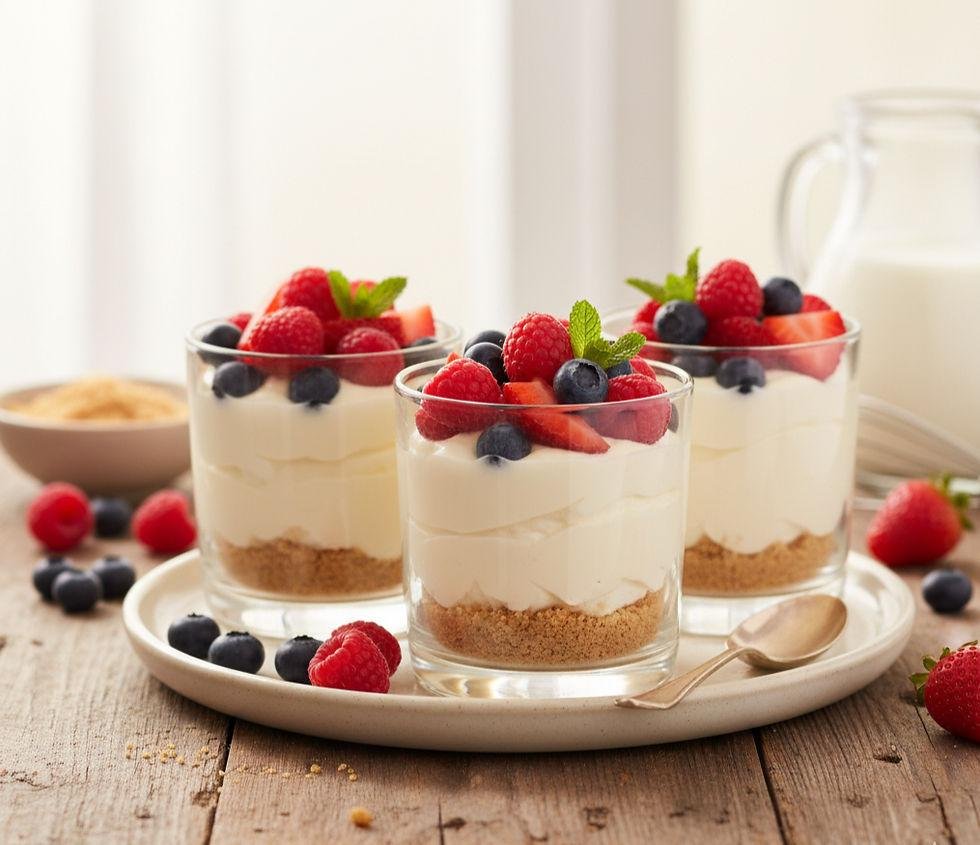
No-Bake Cheesecake Cups are an easy individual dessert made with a buttery graham cracker crust and a smooth, creamy cheesecake filling. Served in small cups or dessert glasses, they have all the classic cheesecake flavors without requiring an oven, a water bath, or complicated baking steps.
The filling combines cream cheese, powdered sugar, vanilla, and whipped cream for a light yet rich consistency. Each cup is finished with a crumbly graham cracker base and can be topped with fresh strawberries, blueberries, cherry sauce, or your favorite cheesecake toppings.
These individual cheesecake desserts are ideal for summer gatherings, birthday parties, holidays, potlucks, or whenever you want a simple make-ahead treat.
Recipe Overview
| Detail | Information |
|---|---|
| Prep Time | 25 minutes |
| Cook Time | 0 minutes |
| Chill Time | 2 hours |
| Total Time | 2 hours 25 minutes |
| Servings | 8 cups |
| Difficulty | Easy |
Why You’ll Love This Recipe
-
No oven required: Everything comes together without baking, making this dessert especially convenient during warmer months.
-
Individual portions: Each cheesecake is served in its own cup, so slicing and serving are unnecessary.
-
Creamy filling: Whipped cream gives the cream cheese mixture a light, fluffy texture while keeping its classic cheesecake flavor.
-
Easy to customize: Add fruit, chocolate, caramel, or cookie crumbs to create different flavors.
-
Make-ahead friendly: Prepare the cups in advance and refrigerate them until dessert time.
Ingredients
For the Graham Cracker Crust
-
1 ½ cups graham cracker crumbs
-
5 tablespoons unsalted butter, melted
-
2 tablespoons granulated sugar
For the Cheesecake Filling
-
8 ounces full-fat cream cheese, softened
-
½ cup powdered sugar
-
1 teaspoon vanilla extract
-
1 cup heavy whipping cream, cold
-
2 tablespoons sour cream
-
1 tablespoon fresh lemon juice
Optional Toppings
-
Fresh strawberries, sliced
-
Fresh blueberries or raspberries
-
Cherry pie filling
-
Chocolate shavings
-
Caramel sauce
-
Additional graham cracker crumbs
Ingredient Notes
Cream cheese: Use full-fat block cream cheese rather than whipped cream cheese or spreadable cream cheese. Let it soften at room temperature so it blends smoothly without lumps.
Heavy whipping cream: Cold heavy whipping cream creates a fluffy texture and helps the cheesecake filling hold its shape. Avoid substituting regular milk.
Graham cracker crumbs: These create the traditional cheesecake base. You can crush whole graham crackers in a food processor or place them in a sealed bag and crush them with a rolling pin.
Sour cream: A small amount adds a subtle tang that balances the sweetness of the filling.
Lemon juice: Fresh lemon juice brightens the cheesecake flavor without making the filling taste strongly of lemon.
How to Make No-Bake Cheesecake Cups
1. Prepare the Graham Cracker Crust
Add the graham cracker crumbs and granulated sugar to a medium mixing bowl. Pour in the melted butter and stir until the crumbs are evenly moistened.
The mixture should resemble damp sand and hold together when lightly pressed.
Divide the crumbs between eight small dessert cups. Use the back of a spoon to gently press the mixture into an even layer at the bottom of each cup.
Place the cups in the refrigerator while preparing the filling.
2. Beat the Cream Cheese
Place the softened cream cheese in a large mixing bowl. Beat with an electric mixer on medium speed until smooth and creamy, approximately 1–2 minutes.
Add the powdered sugar, vanilla extract, sour cream, and lemon juice. Continue mixing until everything is incorporated and no visible lumps remain.
Scrape down the sides of the bowl as needed.
3. Whip the Heavy Cream
In a separate chilled bowl, beat the cold heavy whipping cream until stiff peaks form, approximately 2–4 minutes depending on your mixer.
The cream should hold its shape when the beaters are lifted without looking grainy or overwhipped.
4. Fold the Filling Together
Add the whipped cream to the cream cheese mixture in two or three additions.
Use a spatula to gently fold until the mixture is evenly combined. Avoid vigorous stirring because it can deflate the whipped cream and make the filling less airy.
The finished filling should be thick, smooth, and fluffy.
5. Assemble the Cheesecake Cups
Remove the prepared crusts from the refrigerator.
Spoon or pipe the cheesecake filling evenly over the graham cracker layers. Leave a little room at the top for your preferred toppings.
For a neat presentation, transfer the filling into a piping bag or a resealable plastic bag with one corner snipped off.
6. Chill Until Set
Cover the cups and refrigerate for at least 2 hours.
The filling should become firmer while remaining soft and creamy. Once chilled, add fresh berries, cherry topping, chocolate shavings, or another garnish before serving.
Expert Tips
-
Soften cream cheese properly: Cold cream cheese can create small lumps that are difficult to remove once the filling is mixed.
-
Keep the whipping cream cold: Cold cream whips more effectively and helps create a stable filling.
-
Fold gently: Combining the whipped cream gradually preserves the airy texture.
-
Do not skip chilling: Refrigeration allows the filling to firm up and makes the cups easier to serve.
-
Use a piping bag: This makes filling individual cups cleaner and gives the finished dessert a more polished appearance.
-
Choose appropriately sized cups: Small dessert glasses or 4–6-ounce cups work well for individual portions.
Common Mistakes to Avoid
-
Using cold cream cheese: This can leave lumps throughout the cheesecake filling. Allow it to soften before mixing.
-
Overwhipping the cream: Excessive whipping can make the cream grainy and eventually cause it to separate.
-
Mixing too aggressively: Stirring instead of folding can remove the air from the whipped cream.
-
Adding too much butter: Excess butter can make the graham cracker base greasy rather than crumbly.
-
Serving immediately: The filling needs enough refrigeration time to become firm and develop a better consistency.
Easy Variations
Strawberry Cheesecake Cups: Add sliced fresh strawberries or a spoonful of strawberry topping over the chilled filling.
Chocolate Cheesecake Cups: Mix 2 tablespoons of unsweetened cocoa powder into the cream cheese mixture and finish with chocolate shavings.
Oreo Cheesecake Cups: Replace the graham cracker crumbs with crushed Oreo cookies. Reserve some cookie crumbs for the topping.
Lemon Cheesecake Cups: Add an additional teaspoon of lemon zest to the filling for a brighter citrus flavor.
Caramel Cheesecake Cups: Drizzle caramel sauce over the filling and sprinkle with a few extra graham cracker crumbs.
Ingredient Substitutions
-
Graham crackers: Digestive biscuits or vanilla wafer cookies can replace graham crackers. The flavor will be slightly different.
-
Powdered sugar: Powdered sugar is recommended because it dissolves smoothly. Granulated sugar may leave a grainier texture.
-
Sour cream: Plain full-fat Greek yogurt can be used in the same quantity, although the filling may taste slightly different.
-
Heavy whipping cream: Whipping cream with a suitable fat content can work, but lighter creams may produce a less stable filling.
-
Fresh fruit: Frozen fruit can be used as a topping if thawed and drained thoroughly before adding.
What to Serve With No-Bake Cheesecake Cups
These cheesecake cups are rich and creamy, so lighter accompaniments work particularly well.
-
Fresh berries: Strawberries, raspberries, and blueberries provide a refreshing contrast.
-
Fresh fruit salad: A mixture of seasonal fruit makes a light addition to the dessert table.
-
Coffee: Hot coffee or iced coffee balances the sweetness of the cheesecake.
-
Iced tea: Unsweetened iced tea is a refreshing drink to serve alongside these individual desserts.
-
Chocolate-covered strawberries: These make an attractive addition for celebrations and special occasions.
Storage & Reheating
Refrigerator: Store cheesecake cups covered in the refrigerator for up to 3 days. Keep them chilled until ready to serve.
Freezing: The cheesecake filling can be frozen, although its texture may become slightly different after thawing. For the best presentation, freezing fully assembled cups with fresh fruit toppings is not recommended.
Thawing: If freezing without fresh toppings, thaw the cups overnight in the refrigerator before serving.
Reheating: These cheesecake cups should not be reheated. Serve them cold directly from the refrigerator.
For food safety, avoid leaving the dairy-based dessert at room temperature for more than 2 hours, or 1 hour when temperatures are above 90°F.
Frequently Asked Questions
1. Can I make no-bake cheesecake cups the night before?
Yes. These cups are convenient for preparing ahead. Assemble them, cover, and refrigerate overnight. Add fresh fruit or delicate toppings shortly before serving.
2. How long do no-bake cheesecake cups take to set?
Allow at least 2 hours in the refrigerator. Larger or deeper cups may benefit from additional chilling time.
3. Can I make cheesecake cups without graham crackers?
Yes. Crushed digestive biscuits, vanilla wafers, or Oreo cookies make suitable alternatives. Mix them with melted butter to create a similar crumbly base.
4. Why is my no-bake cheesecake filling too soft?
A soft filling can result from insufficient chilling, underwhipped cream, or cream cheese that was too warm. Make sure the whipping cream reaches stiff peaks and allow enough refrigeration time.
5. Can I use store-bought whipped topping instead of heavy cream?
Yes. Thawed store-bought whipped topping can replace the whipped heavy cream. The sweetness and texture may differ slightly, so adjust the powdered sugar if needed.
6. What size cups should I use?
Four- to six-ounce dessert cups work well for individual portions. Small glass jars, plastic dessert cups, or clear serving glasses are also suitable.
Final Thoughts
No-Bake Cheesecake Cups are a simple way to enjoy classic cheesecake flavors without turning on the oven. With a buttery cookie crust, fluffy cream cheese filling, and customizable toppings, they’re easy to prepare for both everyday desserts and special occasions.
Prepare them ahead, keep them chilled, and finish each cup with your favorite fruit or sweet topping for an attractive individual dessert.
Leave a Reply