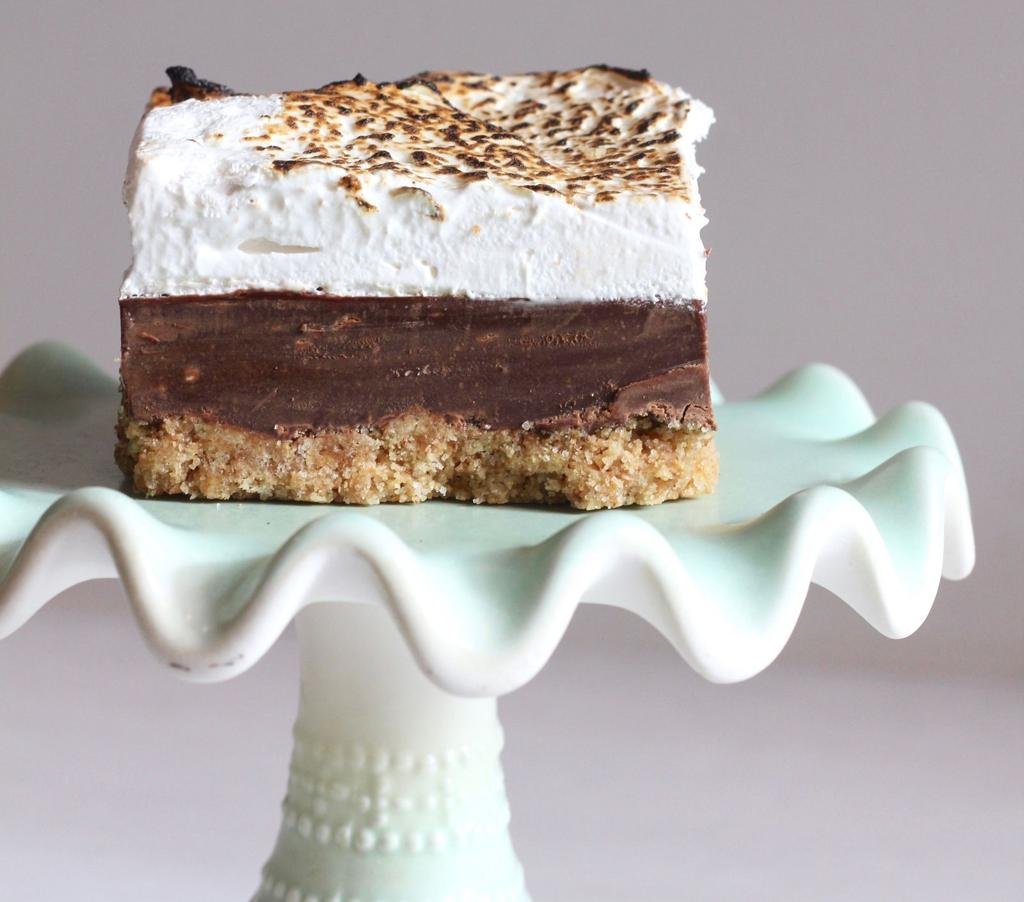
This No-Bake S’mores Dessert brings together the classic flavors of a campfire treat without needing a fire or an oven. It features a buttery graham cracker crust, a rich chocolate ganache layer, and a light, creamy marshmallow topping. Every bite combines crunchy, chocolatey, and fluffy textures that make traditional s’mores so appealing.
It’s an easy make-ahead dessert for summer gatherings, potlucks, family celebrations, or whenever you’re craving something sweet. The layers come together with simple ingredients, and the refrigerator does most of the work.
Recipe Overview
| Details | Information |
|---|---|
| Prep Time | 25 minutes |
| Cook Time | 0 minutes |
| Chill Time | 4 hours |
| Total Time | 4 hours 25 minutes |
| Servings | 12 |
| Difficulty | Easy |
Why You’ll Love This Recipe
-
No oven required: Everything is assembled without baking, making it convenient during warmer months.
-
Classic s’mores flavors: Graham crackers, chocolate, and marshmallows create that familiar combination.
-
Beautiful layers: The contrasting colors and textures make these dessert bars attractive when sliced.
-
Make-ahead friendly: Prepare the dessert several hours before serving so it has enough time to set.
-
Simple ingredients: Most of the ingredients are easy to find in a regular US grocery store.
Ingredients
For the Graham Cracker Crust
-
2 cups graham cracker crumbs (about 14 full graham cracker sheets)
-
6 tablespoons unsalted butter, melted
-
2 tablespoons granulated sugar
For the Chocolate Layer
-
8 ounces semisweet chocolate, finely chopped
-
¾ cup heavy whipping cream
-
1 tablespoon unsalted butter
For the Marshmallow Cream Layer
-
7 ounces marshmallow creme
-
8 ounces cream cheese, softened
-
1 cup heavy whipping cream, cold
-
1 teaspoon vanilla extract
For the Topping
-
1 cup mini marshmallows
-
¼ cup graham cracker crumbs
-
2 tablespoons chocolate chips or chocolate shavings
Ingredient Notes
Graham crackers: Regular honey graham crackers are the best choice because they provide the familiar flavor of traditional s’mores. Crush them into fine crumbs so the crust holds together.
Semisweet chocolate: Semisweet chocolate balances the sweetness of the marshmallow layer. Chopped chocolate bars or good-quality chocolate chips can both work.
Heavy whipping cream: Use cold heavy whipping cream for the marshmallow layer. It whips into a fluffy consistency that helps create a lighter filling.
Marshmallow creme: This gives the dessert its signature marshmallow flavor. Use marshmallow creme rather than regular marshmallows for a smooth filling.
Cream cheese: Full-fat brick-style cream cheese creates a stable, creamy layer. Let it soften before mixing to avoid lumps.
How to Make No-Bake S’mores Dessert
Step 1: Prepare the Graham Cracker Crust
Add the graham cracker crumbs and granulated sugar to a mixing bowl. Pour in the melted butter and stir until the crumbs are evenly moistened.
Transfer the mixture to a 9-inch square baking dish lined with parchment paper. Press it firmly into an even layer using the bottom of a measuring cup.
Refrigerate for about 20 minutes while preparing the chocolate layer.
Step 2: Make the Chocolate Ganache
Place the chopped semisweet chocolate in a heatproof bowl.
Warm the heavy whipping cream in a small saucepan over medium-low heat until steaming but not boiling. Pour it over the chocolate and let it sit for 2 minutes.
Add the butter and stir gently until the chocolate melts and the mixture becomes smooth and glossy.
Allow the ganache to cool slightly, then spread it evenly over the chilled graham cracker crust.
Refrigerate for approximately 20–30 minutes, or until the chocolate layer is beginning to firm up.
Step 3: Prepare the Marshmallow Cream Layer
In a large mixing bowl, beat the softened cream cheese until smooth and creamy.
Add the marshmallow creme and vanilla extract. Mix until everything is fully combined.
In a separate chilled bowl, whip the cold heavy whipping cream until stiff peaks form. This usually takes about 3–4 minutes with an electric mixer.
Gently fold the whipped cream into the marshmallow mixture in batches. Use a spatula and avoid overmixing so the filling stays light and fluffy.
Step 4: Assemble the Dessert
Remove the baking dish from the refrigerator.
Carefully spread the marshmallow cream mixture over the partially set chocolate layer. Use an offset spatula to create an even surface.
Sprinkle the mini marshmallows, graham cracker crumbs, and chocolate shavings over the top.
Step 5: Chill Until Set
Cover the dish and refrigerate for at least 4 hours, preferably until the layers are firm enough to cut cleanly.
Once chilled, lift the dessert out using the parchment paper and slice it into 12 squares with a sharp knife.
Serve cold.
Expert Tips
-
Press the crust firmly: A tightly packed graham cracker crust is less likely to crumble when serving.
-
Avoid overheating the chocolate: Excessive heat can make ganache grainy or cause the chocolate to separate.
-
Cool the ganache before layering: If it’s too warm, it can soften the crust and affect the marshmallow filling.
-
Use cold whipping cream: Cold cream whips more effectively and helps the filling maintain its fluffy texture.
-
Allow enough chilling time: Cutting the dessert too early can cause the layers to slide or become messy.
-
Use a warm knife: Dip your knife in warm water and wipe it dry between cuts for cleaner slices.
Common Mistakes to Avoid
-
Using large graham cracker pieces: Coarse crumbs make the crust difficult to press together. Crush them finely before adding the butter.
-
Adding warm ganache to the filling: Always allow the chocolate layer to cool and begin setting before adding the marshmallow mixture.
-
Overwhipping the cream: Stop when stiff peaks form. Overwhipping can make the cream grainy.
-
Skipping refrigeration: The dessert needs enough time to firm up. Rushing this step makes serving difficult.
-
Cutting immediately after chilling: Let the dessert sit for a few minutes at room temperature if it is too firm to slice comfortably.
Easy Variations
-
Peanut Butter S’mores: Spread a thin layer of creamy peanut butter over the graham cracker crust before adding the chocolate ganache.
-
Dark Chocolate S’mores: Replace semisweet chocolate with dark chocolate for a less sweet, richer chocolate flavor.
-
Oreo S’mores Dessert: Replace the graham cracker crust with crushed chocolate sandwich cookies mixed with melted butter.
-
Toasted Marshmallow Topping: Lightly toast the mini marshmallows with a kitchen torch just before serving for a more traditional campfire-style flavor.
-
Individual S’mores Cups: Assemble the same layers in small dessert cups instead of a square baking dish.
Ingredient Substitutions
| Original Ingredient | Substitute |
|---|---|
| Graham crackers | Digestive biscuits or graham-style crumbs |
| Semisweet chocolate | Milk chocolate or dark chocolate |
| Unsalted butter | Salted butter (omit added salt if using any) |
| Heavy whipping cream | Heavy cream with at least 36% milk fat |
| Marshmallow creme | Marshmallow fluff |
| Cream cheese | Whipped cream cheese, although the filling may be softer |
Keep in mind that changing the chocolate or crust can affect the overall sweetness and texture.
What to Serve With It
This dessert is rich and sweet, so lighter accompaniments work particularly well.
-
Fresh strawberries: Their natural tartness balances the chocolate and marshmallow.
-
Fresh raspberries: Add a slightly tangy contrast to the creamy layers.
-
Vanilla ice cream: A small scoop makes the dessert feel more like a traditional ice cream treat.
-
Fresh fruit salad: Provides a refreshing option alongside the rich chocolate layers.
-
Coffee or iced coffee: The slightly bitter flavor complements the sweetness of the dessert.
Storage & Reheating
Refrigerator: Store leftover No-Bake S’mores Dessert in an airtight container or cover the baking dish tightly with plastic wrap. Refrigerate for up to 3 days for the best texture and quality.
Freezing: Freezing is possible, but the whipped cream and cream cheese filling may change texture after thawing. For the best results, enjoy it fresh from the refrigerator.
Thawing: If frozen, thaw overnight in the refrigerator rather than at room temperature.
Reheating: This dessert is intended to be served cold, so reheating is unnecessary. If you want toasted marshmallows, toast only the topping immediately before serving.
Frequently Asked Questions
1. Can I make No-Bake S’mores Dessert the night before?
Yes. This dessert is well suited to overnight preparation. Assemble all the layers, cover the dish, and refrigerate overnight. Add the decorative toppings shortly before serving if you want the graham cracker crumbs to remain crisp.
2. Does this recipe require an oven?
No. The crust is made with graham cracker crumbs and melted butter, and the chocolate and marshmallow layers are prepared without baking.
3. How long does No-Bake S’mores Dessert need to chill?
Allow at least 4 hours in the refrigerator. Overnight chilling also works and gives the layers plenty of time to firm up.
4. Can I use regular marshmallows instead of marshmallow creme?
Marshmallow creme is recommended for the filling because it blends smoothly with cream cheese. Regular marshmallows are better used as a topping rather than substituted directly in the filling.
5. How do I keep the dessert from falling apart?
Press the crust firmly into the dish, let the chocolate layer partially set, and refrigerate the assembled dessert until firm. Use a sharp knife to cut individual portions.
6. Can I toast the marshmallows on top?
Yes. A kitchen torch can lightly toast the mini marshmallows just before serving. Avoid using a torch on a glass baking dish unless the dish is specifically designed for that purpose.
Final Thoughts
No-Bake S’mores Dessert is a fun way to enjoy the familiar combination of graham crackers, chocolate, and marshmallows in an easy layered treat. With its buttery crust, smooth chocolate center, and fluffy marshmallow topping, it’s a convenient make-ahead option for summer parties, potlucks, and family gatherings.
Prepare it ahead, keep it chilled, and add the finishing toppings just before serving for an attractive dessert everyone can enjoy.
Leave a Reply