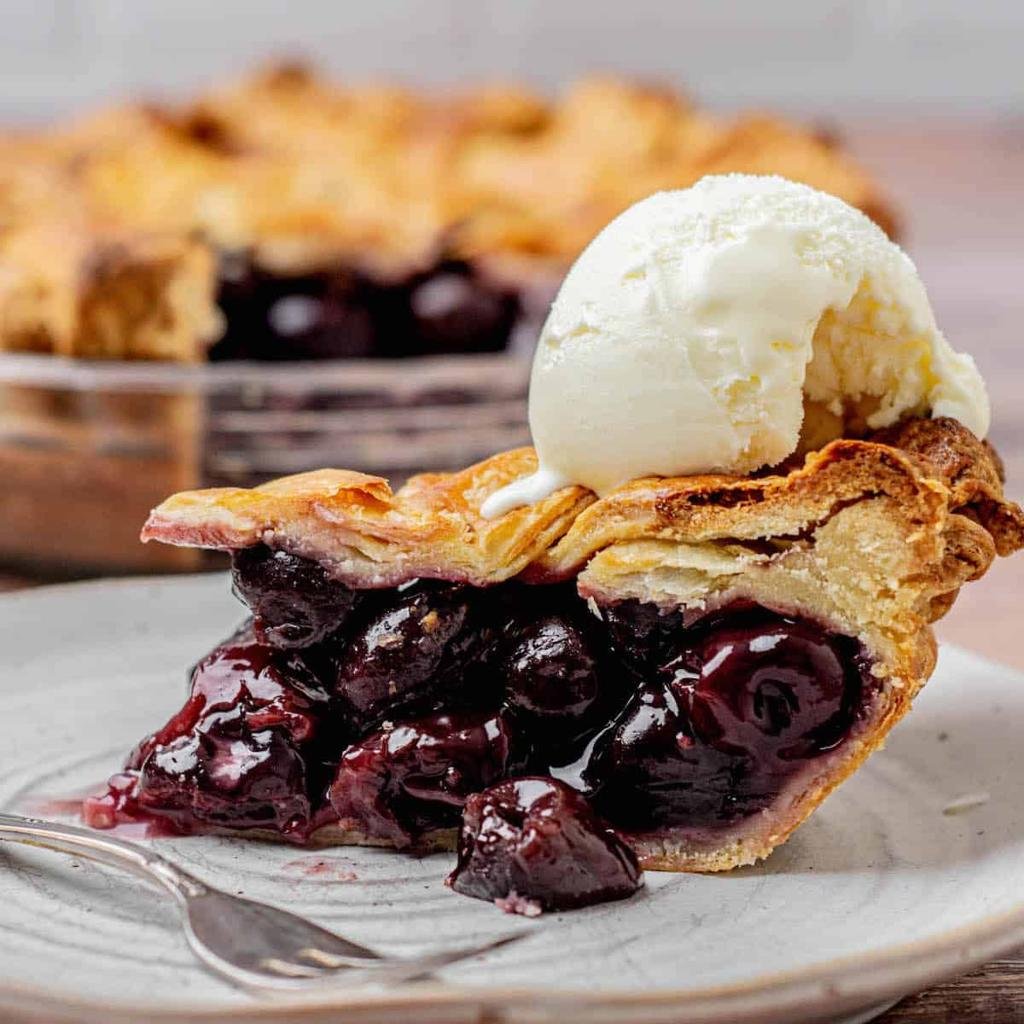
Cherry Pie is a timeless American dessert featuring a flaky, buttery double crust filled with sweet-tart cherries and a rich, thickened fruit filling. Its bright cherry flavor, golden pastry, and beautiful lattice topping make it a wonderful choice for summer gatherings, holiday dinners, potlucks, or a weekend baking project.
This homemade cherry pie uses fresh or frozen tart cherries, a touch of almond extract, and just enough cornstarch to create a filling that holds together when sliced without becoming overly firm. Serve it slightly warm with a scoop of vanilla ice cream for a classic dessert.
Recipe Overview
- Prep Time: 30 minutes
- Cook Time: 60–65 minutes
- Cooling Time: 3–4 hours
- Total Time: Approximately 4 hours 35 minutes
- Servings: 8 slices
- Difficulty: Moderate
Why You’ll Love This Recipe
- Flaky homemade crust: A buttery double crust creates a crisp, golden exterior that complements the soft cherry filling.
- Balanced cherry flavor: Tart cherries, sugar, lemon juice, and almond extract create a naturally fruity filling.
- Beautiful presentation: A lattice crust gives the pie a traditional homemade appearance while allowing steam to escape.
- Flexible ingredients: Fresh and frozen pitted cherries both work well.
- Make-ahead friendly: The pie can be baked in advance and served when needed.
Ingredients
For the Pie Crust
- 2½ cups (315 g) all-purpose flour
- 1 tablespoon granulated sugar
- 1 teaspoon salt
- 1 cup (226 g) unsalted butter, cold and cubed
- 6–8 tablespoons ice water
For the Cherry Filling
- 6 cups (approximately 900 g) pitted tart cherries, fresh or frozen
- 1 cup (200 g) granulated sugar
- ¼ cup (32 g) cornstarch
- 1 tablespoon fresh lemon juice
- ½ teaspoon almond extract
- ½ teaspoon vanilla extract
- ¼ teaspoon salt
- 1 tablespoon unsalted butter, cut into small pieces
For the Egg Wash
- 1 large egg
- 1 tablespoon milk
- 1 tablespoon coarse sugar, optional
Ingredient Notes
Tart cherries: Sour or tart cherries provide the traditional sweet-tangy flavor associated with classic cherry pie. Frozen pitted tart cherries are a convenient alternative when fresh cherries are unavailable.
Cornstarch: This thickens the cherry juices and helps the filling hold its shape after cooling.
Almond extract: A small amount complements the natural flavor of cherries. Avoid adding too much because almond extract can quickly overpower the fruit.
Butter: Small pieces of butter added to the filling provide a little richness.
Pie crust: Cold butter and ice water are important for creating a flaky pastry. Keep the dough chilled while preparing the filling.
How to Make Cherry Pie
1. Prepare the Pie Dough
In a large mixing bowl, combine flour, sugar, and salt. Add the cold cubed butter and cut it into the flour using a pastry cutter or your fingertips until the mixture resembles coarse crumbs with some pea-sized butter pieces remaining.
Gradually add ice water, one tablespoon at a time, mixing gently until the dough begins to hold together.
Divide the dough into two portions, shape each into a flat disk, wrap, and refrigerate for at least 1 hour.
2. Prepare the Cherry Filling
Place the pitted cherries in a large saucepan. If using frozen cherries, thaw them first and reserve their juices.
Add sugar, cornstarch, lemon juice, almond extract, vanilla extract, and salt. Stir until the cherries are evenly coated.
Cook over medium heat for approximately 5–8 minutes, stirring frequently, until the juices become glossy and noticeably thickened.
Remove from the heat and allow the filling to cool. It should be thick but still contain recognizable whole cherries.
3. Roll Out the Bottom Crust
Preheat the oven to 425°F (220°C).
Lightly flour a work surface and roll one dough disk into a circle approximately 12 inches in diameter.
Transfer it carefully into a 9-inch pie dish. Gently press the pastry into the bottom and sides without stretching it.
Trim any excess dough, leaving approximately 1 inch around the edge.
4. Add the Cherry Filling
Spoon the cooled cherry filling into the prepared crust, spreading it evenly.
Distribute the small pieces of butter over the filling.
5. Create the Lattice Top
Roll out the second dough disk and cut it into strips approximately ¾–1 inch wide.
Arrange half the strips across the pie, leaving small spaces between them. Weave the remaining strips over and under the first set to create a lattice pattern.
Trim the edges and fold the top and bottom crust edges together. Crimp with your fingers or a fork to seal.
6. Apply the Egg Wash
Whisk the egg and milk together in a small bowl.
Brush the mixture lightly over the lattice crust. Sprinkle with coarse sugar if desired.
Place the pie on a baking sheet to catch any bubbling juices.
7. Bake the Pie
Bake at 425°F (220°C) for 20 minutes.
Reduce the oven temperature to 375°F (190°C) and continue baking for approximately 35–45 minutes.
The crust should be deeply golden, and the filling should bubble visibly through the lattice, including near the center.
If the edges brown too quickly, cover them loosely with aluminum foil or a pie crust shield.
8. Cool Before Slicing
Remove the pie from the oven and place it on a cooling rack.
Allow it to cool for at least 3–4 hours before slicing. This resting time helps the filling set properly and prevents the slices from becoming runny.
Expert Tips
- Keep the butter cold: Warm butter can make pie dough greasy and reduce its flaky texture.
- Cool the filling: Adding hot filling to an unbaked crust can soften the pastry before baking.
- Watch the center: Bubbling around the center indicates that the filling has heated sufficiently for the cornstarch to thicken properly.
- Protect the crust: Use foil around the edges if they become golden before the filling finishes baking.
- Allow enough cooling time: Cutting into the pie too early can result in a loose filling, even when it has been properly baked.
Common Mistakes to Avoid
- Using too much liquid: Excess cherry juice can make the filling watery. If using frozen cherries, manage the thawed juices rather than adding extra liquid unnecessarily.
- Skipping the cooling period: The filling needs time to set after baking.
- Overworking the dough: Excessive mixing can develop gluten and create a tougher crust.
- Adding too much almond extract: A little goes a long way.
- Removing the pie too early: A pale crust or filling that has not bubbled sufficiently may indicate underbaking.
Easy Variations
- Crumb-Topped Cherry Pie: Replace the lattice crust with a buttery crumb topping made from flour, brown sugar, and butter.
- Cherry Almond Pie: Add ¼ cup sliced almonds to the filling or sprinkle them over the crust before baking.
- Mixed Berry Cherry Pie: Replace 1 cup of cherries with blueberries or raspberries for a different fruit combination.
- Sweet Cherry Pie: Use sweet cherries instead of tart cherries and reduce the sugar to approximately ¾ cup, adjusting to taste.
Ingredient Substitutions
- Frozen cherries for fresh: Use the same quantity of pitted frozen tart cherries. Thaw before preparing the filling.
- Sweet cherries for tart cherries: Reduce the sugar because sweet cherries contain more natural sweetness.
- Lemon juice for additional acidity: Fresh lemon juice helps balance the sweetness. Bottled lemon juice can be used if necessary.
- Store-bought pie crust: Two refrigerated pie crusts can replace the homemade pastry when convenience is important.
- Arrowroot starch for cornstarch: Use approximately ⅓ cup arrowroot starch as an alternative thickener. The filling may have a slightly different consistency.
What to Serve With Cherry Pie
Cherry pie pairs especially well with:
- Vanilla ice cream: Its creamy sweetness balances the tart cherry filling.
- Freshly whipped cream: A light topping adds richness without overpowering the fruit.
- Coffee: A cup of hot coffee complements the buttery pastry and sweet-tart filling.
- Vanilla custard: A spoonful of custard creates a smooth contrast with the fruit.
Storage & Reheating
Room temperature: Because this recipe uses a cooked fruit filling, the baked pie can generally be kept covered at room temperature for up to 2 days in a cool environment. Refrigerate it sooner in warm conditions.
Refrigerator: Store covered in the refrigerator for up to 4 days.
Freezer: Once completely cooled, wrap the pie tightly and freeze for up to 3 months for best quality. Thaw overnight in the refrigerator.
Reheating: Warm individual slices in a 300°F (150°C) oven for approximately 10–15 minutes. This helps restore some crispness to the pastry. Avoid prolonged microwave heating because it can soften the crust.
Frequently Asked Questions
1. Can I use frozen cherries to make cherry pie?
Yes. Frozen pitted tart cherries work well. Thaw them first and account for the liquid they release when preparing the filling. This helps prevent excess moisture.
2. Why is my cherry pie filling runny?
A runny filling can result from insufficient thickener, excess cherry juice, or cutting the pie before it has cooled. Make sure the filling bubbles during baking and allow at least 3–4 hours for cooling.
3. Should I cook cherry pie filling before baking?
Cooking the filling briefly before assembling the pie helps dissolve the cornstarch and control its consistency. It also allows you to see whether the mixture has thickened before adding it to the crust.
4. Can I make cherry pie without a lattice crust?
Absolutely. Use a complete top crust instead, cutting a few small vents to allow steam to escape. You can also use a crumb topping.
5. How do I know when cherry pie is done?
The crust should be golden brown, and the filling should bubble visibly through the lattice, particularly near the center. If the top browns too quickly, cover it loosely with foil while the filling finishes baking.
6. Can I prepare cherry pie ahead of time?
Yes. You can prepare the pie dough a day or two ahead and refrigerate it. The filling can also be prepared in advance. Assemble and bake the pie when convenient, allowing sufficient time for cooling before serving.
Final Thoughts
Homemade cherry pie brings together everything that makes a classic fruit dessert special: flaky pastry, juicy cherries, and a balanced sweet-tart filling. Whether you prepare it for a summer gathering or a holiday table, serve each slice with vanilla ice cream or whipped cream for a traditional finishing touch.
Leave a Reply