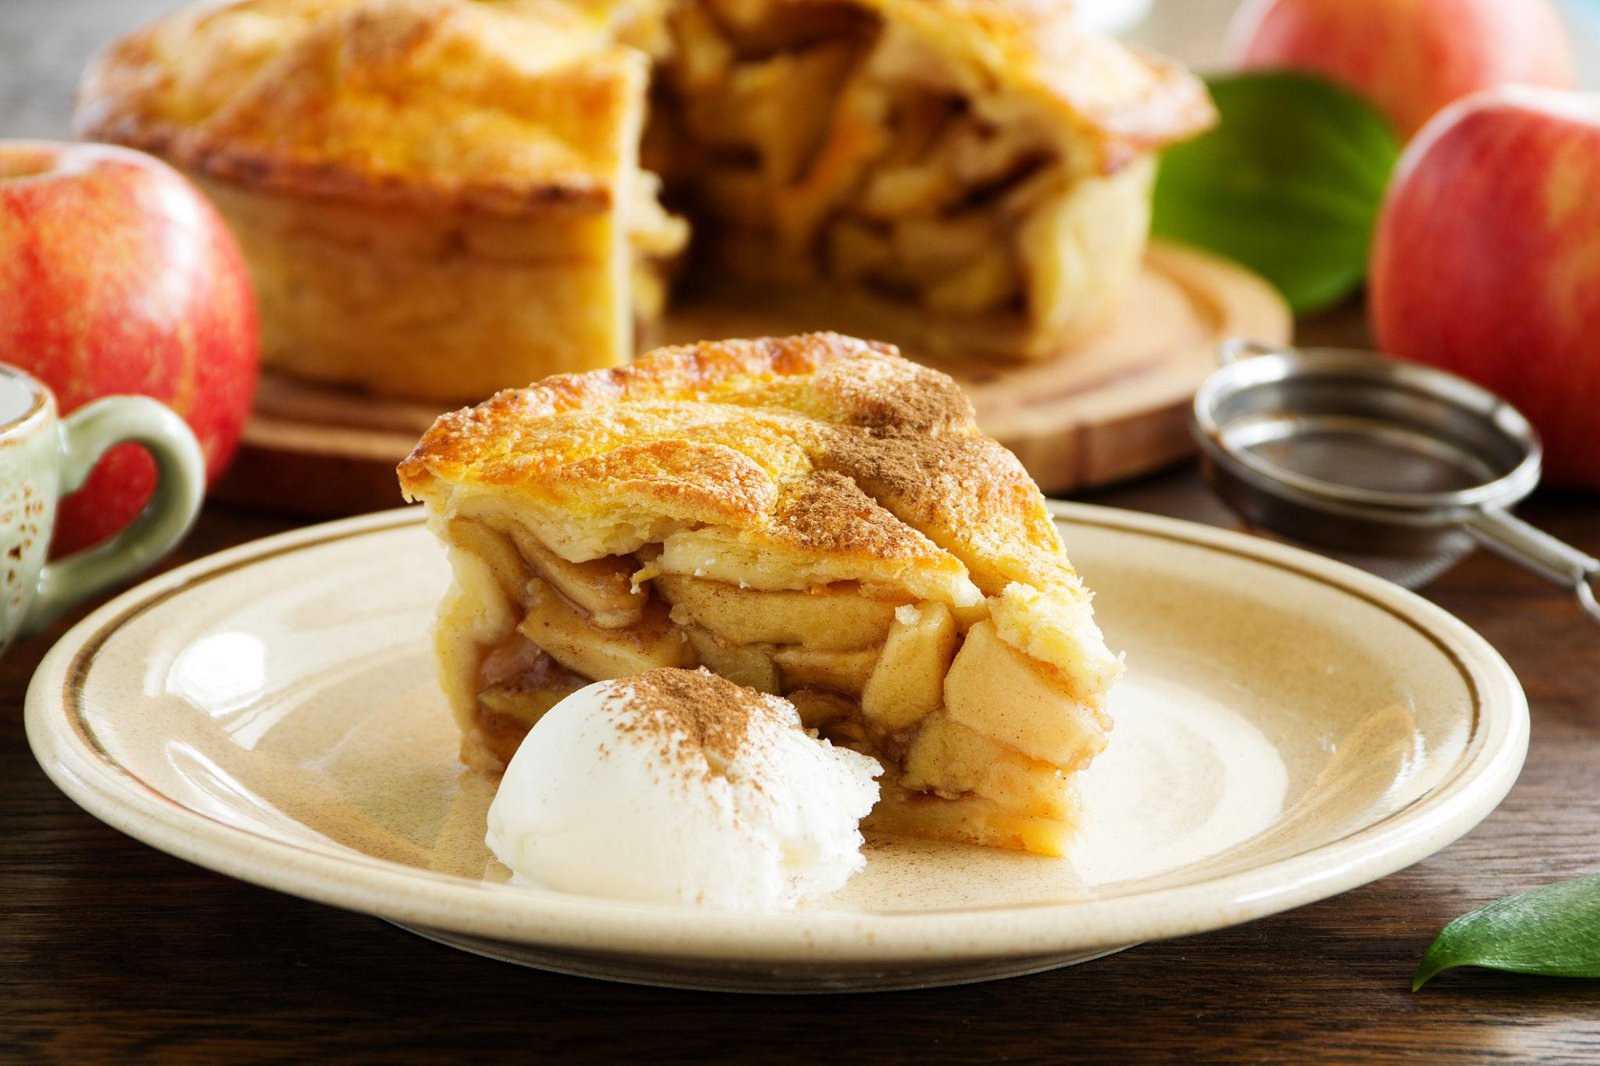
Classic Apple Pie is a traditional American dessert made with tender, cinnamon-spiced apples tucked inside a flaky, buttery double crust. The filling is sweet with a little tartness from fresh apples, while the golden pastry adds a crisp, rich contrast.
This homemade apple pie is a wonderful choice for Thanksgiving, holiday gatherings, Sunday dinners, or any occasion that calls for a comforting homemade dessert. A combination of firm apples, warm spices, and a properly baked crust creates a pie with a flavorful filling that holds together nicely when sliced.
Recipe Overview
| Detail | Information |
|---|---|
| Prep Time | 35 minutes |
| Cook Time | 60 minutes |
| Chilling Time | 1 hour |
| Cooling Time | 2 hours |
| Total Time | 4 hours 35 minutes |
| Servings | 8 slices |
| Difficulty | Moderate |
Why You’ll Love This Recipe
-
Flaky homemade crust: A buttery pastry crust creates a crisp, golden exterior with a tender texture.
-
Balanced apple filling: Combining sweet and tart apples gives the filling a more interesting flavor.
-
Classic cinnamon flavor: Cinnamon and nutmeg add warmth without overpowering the apples.
-
Great for holidays: Apple pie is a familiar American dessert that works beautifully for Thanksgiving and family gatherings.
-
Make-ahead friendly: You can prepare the pastry in advance and assemble the pie when you’re ready to bake.
Ingredients
For the Pie Crust
-
2½ cups all-purpose flour
-
1 tablespoon granulated sugar
-
1 teaspoon salt
-
1 cup unsalted butter, cold and cut into small cubes
-
6–8 tablespoons ice water
For the Apple Filling
-
2½ pounds firm apples, peeled, cored, and thinly sliced (about 6 cups)
-
⅔ cup granulated sugar
-
¼ cup all-purpose flour
-
1 tablespoon fresh lemon juice
-
1½ teaspoons ground cinnamon
-
¼ teaspoon ground nutmeg
-
¼ teaspoon salt
-
1 tablespoon unsalted butter, cut into small pieces
For the Topping
-
1 large egg
-
1 tablespoon milk
-
1 teaspoon coarse sugar (optional)
Ingredient Notes
Apples: Granny Smith apples are an excellent choice because their tart flavor balances the sweetness of the filling. Honeycrisp, Braeburn, or a combination of sweet and tart apples also works well.
Butter: Use cold unsalted butter for the pastry. Keeping it cold helps create small pockets of fat that contribute to a flaky crust.
Flour: All-purpose flour thickens the apple juices and helps prevent a watery filling.
Lemon juice: A little fresh lemon juice brightens the apple flavor and balances the sugar.
How to Make Classic Apple Pie
1. Prepare the Pie Dough
In a large mixing bowl, combine the flour, sugar, and salt. Add the cold butter cubes and work them into the flour using a pastry cutter or your fingertips until the mixture resembles coarse crumbs with some pea-sized butter pieces remaining.
Add ice water one tablespoon at a time, mixing gently until the dough begins to come together.
Divide the dough into two equal portions. Shape each into a flat disk, wrap separately, and refrigerate for at least 1 hour.
2. Prepare the Apple Filling
Peel, core, and slice the apples into approximately ¼-inch-thick pieces.
Place them in a large bowl. Add the sugar, flour, lemon juice, cinnamon, nutmeg, and salt.
Toss until the apple slices are evenly coated and the flour and spices are distributed throughout the mixture.
3. Roll Out the Bottom Crust
Preheat your oven to 425°F (220°C).
Lightly flour a clean work surface. Roll one chilled dough disk into a circle approximately 12 inches wide.
Carefully transfer it into a 9-inch pie dish. Gently press the pastry into the bottom and sides without stretching it.
Trim excess dough, leaving about 1 inch hanging over the edge.
4. Add the Apple Filling
Transfer the prepared apple mixture into the pie crust, arranging the slices in an even mound.
Distribute the small pieces of butter over the filling. This adds richness as the apples bake.
5. Add the Top Crust
Roll out the second dough disk into another 12-inch circle.
Place it over the apple filling. Trim the excess pastry, leaving enough to seal the edges.
Fold the top crust underneath the bottom crust edge and press together. Crimp the edges using your fingers or a fork.
Cut 4–5 small slits into the top crust to allow steam to escape during baking.
6. Apply the Egg Wash
Whisk the egg and milk together in a small bowl.
Brush a thin, even layer over the top crust. Sprinkle with coarse sugar if desired.
7. Bake the Apple Pie
Place the pie on a baking sheet to catch any bubbling juices.
Bake at 425°F for 20 minutes. Reduce the oven temperature to 375°F (190°C) and continue baking for approximately 40–45 minutes.
The pie is ready when the crust is deeply golden and the filling bubbles through the vents. The apples should be tender when gently pierced with a thin knife.
If the crust edges brown too quickly, cover them loosely with foil.
8. Cool Before Slicing
Remove the pie from the oven and place it on a cooling rack.
Allow it to cool for at least 2 hours before slicing. This gives the filling time to settle and thicken, making cleaner slices possible.
Expert Tips
-
Choose firm apples: Softer varieties can break down too much during baking and create a mushy filling.
-
Keep the butter cold: Warm butter can make the pastry difficult to handle and reduce its flaky texture.
-
Avoid thick apple slices: Thin, evenly sliced apples cook more consistently.
-
Protect the crust: If the edges become golden before the center is finished, cover them with foil.
-
Let the pie cool completely: Cutting too early can cause the filling to run instead of holding its shape.
-
Use a baking sheet: Placing the pie on a baking sheet makes it easier to handle and catches any overflowing filling.
Common Mistakes to Avoid
-
Using overly soft apples: These can turn into applesauce during baking. Choose firm varieties instead.
-
Skipping the steam vents: Without openings in the top crust, steam has difficulty escaping.
-
Adding too much water to the dough: This can make the pastry tough. Add water gradually.
-
Overworking the pastry: Handle the dough gently to maintain a tender crust.
-
Slicing while hot: The filling needs time to settle after baking.
Easy Variations
-
Dutch Apple Pie: Replace the traditional top crust with a buttery streusel topping made from flour, brown sugar, and butter.
-
Caramel Apple Pie: Drizzle caramel sauce over the cooled filling before serving.
-
Apple Pecan Pie: Add approximately ½ cup chopped pecans to the apple mixture for extra crunch.
-
Extra-Spiced Apple Pie: Add a small pinch of ground cloves or allspice alongside the cinnamon and nutmeg.
Ingredient Substitutions
-
Brown sugar: Replace some or all of the granulated sugar with light brown sugar for a deeper, molasses-like sweetness.
-
Cornstarch: Use 2 tablespoons of cornstarch instead of ¼ cup flour as the filling thickener.
-
Store-bought pie crust: Two refrigerated 9-inch pie crusts can replace the homemade pastry when you need to save time.
-
Dairy-free butter: A suitable plant-based baking butter can replace regular butter, although the pastry texture may vary.
What to Serve With Classic Apple Pie
Classic apple pie tastes wonderful on its own, but a few simple additions make it even more enjoyable.
-
Vanilla ice cream: The cool, creamy texture pairs beautifully with warm cinnamon apples.
-
Fresh whipped cream: Adds a light, creamy contrast to the buttery crust.
-
Caramel sauce: A small drizzle adds extra sweetness and a rich caramel flavor.
-
Hot coffee: Its slightly bitter flavor balances the sweetness of the pie.
-
Black tea: A warm cup of tea makes a lovely accompaniment for an afternoon dessert.
Storage & Reheating
Room temperature: Because this recipe contains no custard or dairy-based filling, a fully cooled pie can generally be kept covered at room temperature for up to 2 days in a cool environment.
Refrigerator: Store leftover apple pie covered in the refrigerator for up to 4 days.
Freezer: Wrap individual slices or the whole cooled pie tightly in plastic wrap and foil. Freeze for up to 3 months for best quality.
Reheating: Warm individual slices in a 300°F oven for approximately 10–15 minutes, or until heated through. This helps restore some crispness to the crust. Avoid prolonged microwave heating because it can make the pastry soft.
Frequently Asked Questions
1. What are the best apples for classic apple pie?
Granny Smith, Honeycrisp, Braeburn, and Pink Lady are good choices because they hold their shape reasonably well during baking. Combining tart and sweet varieties creates a balanced filling.
2. Should I cook apples before putting them in the pie?
No. This recipe uses raw sliced apples mixed with sugar, flour, and spices. They soften during baking while releasing their natural juices.
3. How do I prevent a watery apple pie?
Use firm apples, measure the thickener accurately, and bake until the filling visibly bubbles. Most importantly, allow the pie to cool completely before cutting so the filling can set.
4. Why is my apple pie crust soggy on the bottom?
A soggy bottom can result from excess moisture, insufficient baking, or a pie dish that does not heat the bottom crust effectively. Baking on a preheated baking sheet can help improve bottom-crust browning.
5. Can I make apple pie ahead of time?
Yes. You can prepare the pastry up to 2 days ahead and refrigerate it. You can also assemble the pie shortly before baking. For the best crust texture, bake it fresh rather than leaving an assembled unbaked pie in the refrigerator for an extended period.
6. Can I freeze homemade apple pie?
Yes. A fully baked and cooled apple pie can be wrapped securely and frozen for up to 3 months for best quality. Thaw it in the refrigerator before reheating.
Final Thoughts
Classic Apple Pie brings together everything that makes homemade desserts special: a buttery pastry crust, tender apples, and the familiar warmth of cinnamon and nutmeg. Serve a slice with vanilla ice cream or whipped cream for a traditional American dessert that fits just as naturally on a holiday table as it does after an ordinary family dinner.
Leave a Reply