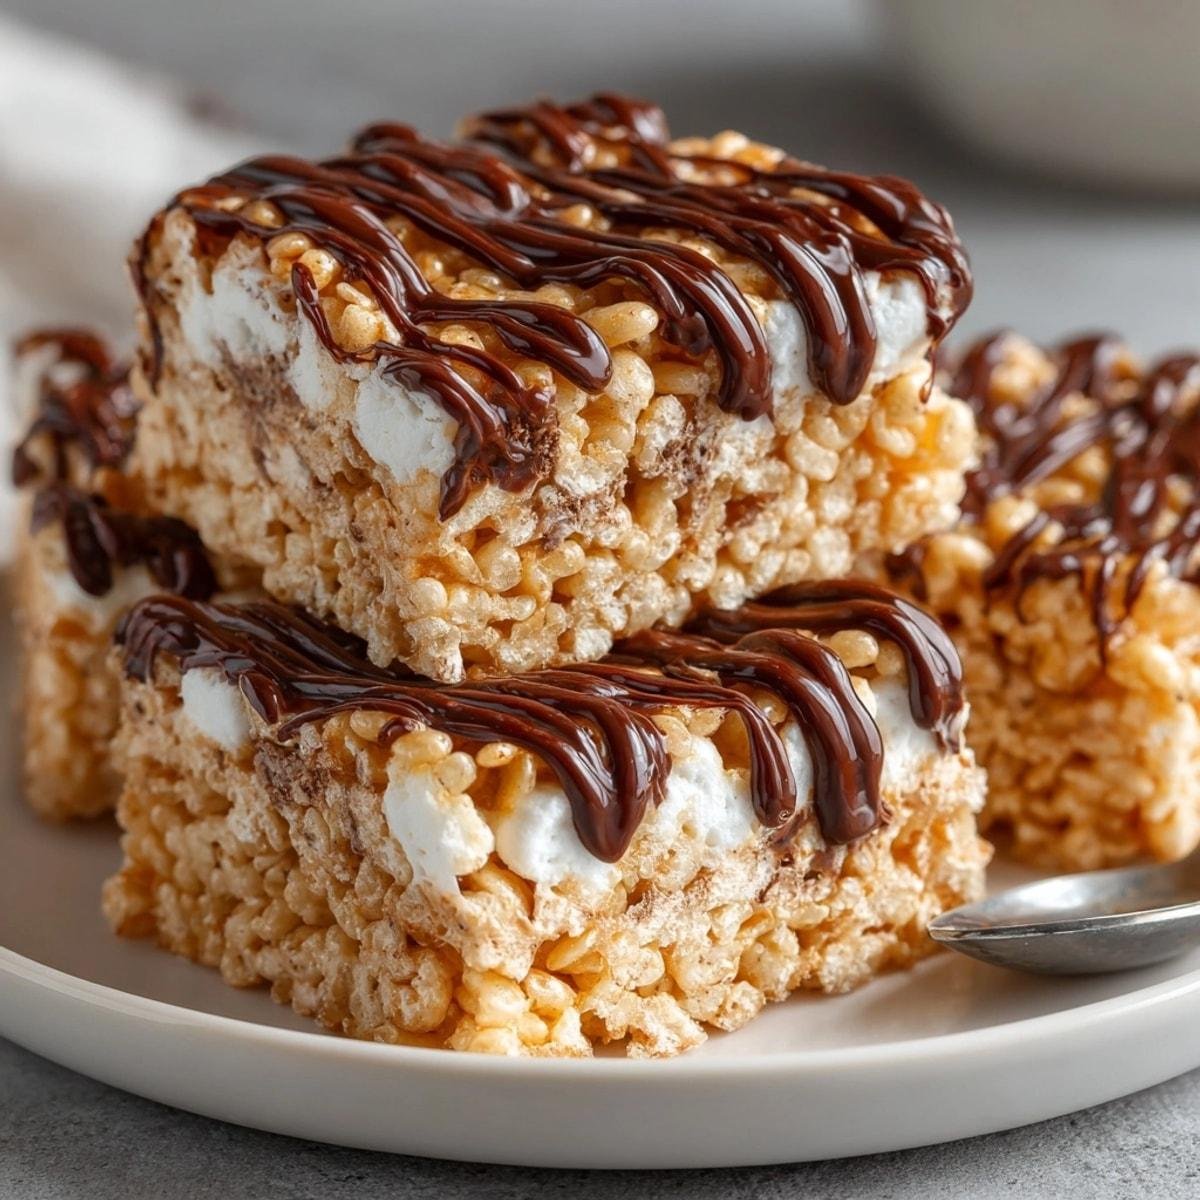
Homemade Rice Krispie Treats are a classic no-bake dessert made with crispy rice cereal, melted butter, and gooey marshmallows. They’re sweet, buttery, chewy, and wonderfully crunchy, with just a handful of simple ingredients.
These easy Rice Krispie Treats come together on the stovetop in minutes without needing an oven or complicated equipment. They’re great for after-school snacks, birthday parties, bake sales, holiday gatherings, or whenever you want a quick homemade sweet treat.
The secret to getting soft, chewy squares instead of hard, crunchy ones is to melt the marshmallows gently and avoid pressing the cereal mixture too firmly into the pan.
Recipe Overview
| Detail | Information |
|---|---|
| Prep Time | 10 minutes |
| Cook Time | 5 minutes |
| Setting Time | 45 minutes |
| Total Time | 1 hour |
| Servings | 16 squares |
| Difficulty | Easy |
Why You’ll Love This Recipe
-
Only a few ingredients: You need just cereal, marshmallows, butter, vanilla, and a little salt.
-
No baking required: Everything comes together on the stovetop.
-
Soft and chewy texture: The melted marshmallows hold the cereal together while keeping every bite light and crispy.
-
Easy to customize: Add chocolate chips, sprinkles, peanut butter, or other favorite mix-ins.
-
Great for sharing: Cut them into squares for parties, lunchbox treats, or homemade dessert platters.
Ingredients
You’ll need the following ingredients to make a batch of homemade Rice Krispie Treats.
-
6 cups crispy rice cereal: The classic crisp rice breakfast cereal provides the signature light and crunchy texture.
-
10 ounces mini marshmallows: Approximately one standard bag. These melt into the buttery mixture and bind the cereal together.
-
6 tablespoons unsalted butter: Adds richness and a delicious buttery flavor.
-
1 teaspoon vanilla extract: Gives the marshmallow mixture a little extra flavor.
-
¼ teaspoon salt: Balances the sweetness and brings out the buttery flavor.
Optional: Add 1 cup of extra mini marshmallows at the end for little pockets of marshmallow throughout the treats.
Ingredient Notes
Crispy rice cereal: Use fresh cereal for the best crunch. Stale cereal can make the finished treats less crisp.
Mini marshmallows: These melt more quickly and evenly than large marshmallows. If using large marshmallows, allow a little extra melting time.
Butter: Unsalted butter gives you better control over the saltiness. Salted butter also works; simply reduce or omit the added salt.
Vanilla extract: Pure vanilla extract adds a pleasant flavor, but it can be left out if you prefer a more traditional taste.
How to Make Homemade Rice Krispie Treats

Follow these simple steps to make soft, chewy, homemade Rice Krispie Treats.
Step 1: Prepare the pan.
Lightly grease a 9-by-13-inch baking pan with butter or nonstick cooking spray. You can also line it with parchment paper, leaving some overhang on the sides to make removing the treats easier.
Step 2: Melt the butter.
Place a large saucepan over low heat. Add the butter and let it melt completely, stirring occasionally.
Keep the heat low to prevent the butter from browning or burning.
Step 3: Melt the marshmallows.
Add the mini marshmallows to the melted butter. Stir continuously until they are completely melted and smooth.
Remove the saucepan from the heat as soon as the mixture becomes creamy. Stir in the vanilla extract and salt.
Step 4: Add the cereal.
Pour the crispy rice cereal into the melted marshmallow mixture. Gently fold everything together with a buttered spatula until the cereal is evenly coated.
If using the optional extra marshmallows, fold them in at this stage.
Step 5: Transfer to the pan.
Immediately transfer the mixture to your prepared pan. Spread it evenly using a lightly buttered spatula or clean, greased hands.
Press gently rather than packing the mixture tightly. This helps keep the treats soft and chewy.
Step 6: Let the treats set.
Allow the mixture to cool at room temperature for approximately 45 minutes, or until firm enough to cut.
Step 7: Cut and serve.
Lift the mixture out using the parchment paper, if used. Cut into 16 squares with a lightly buttered knife and serve.
Expert Tips for the Best Rice Krispie Treats
-
Use low heat: High heat can make melted marshmallows stiff and chewy, resulting in harder treats.
-
Don’t overcook the marshmallows: Remove the pan from the heat once they’re completely melted.
-
Work quickly: The mixture becomes harder to spread as it cools, so transfer it to the pan immediately.
-
Don’t pack the mixture: Pressing too firmly compresses the cereal and creates dense squares.
-
Use fresh ingredients: Fresh marshmallows and crispy rice cereal give the best texture.
-
Grease your utensils: A little butter or cooking spray prevents the sticky mixture from clinging to your spatula and hands.
Common Mistakes to Avoid
-
Using high heat: This can make the marshmallow mixture too firm. Always melt the ingredients over low heat.
-
Overmixing: Excessive stirring after adding the cereal can crush it and reduce its crisp texture.
-
Pressing too hard: Firmly packing the mixture makes the treats dense instead of light and chewy.
-
Waiting too long to transfer: The mixture becomes difficult to spread as it cools. Prepare your pan before starting.
-
Refrigerating to speed up setting: The refrigerator can make the treats unnecessarily firm. Let them set at room temperature instead.
Easy Variations
Once you know how to make the classic version, you can easily change the flavor.
-
Chocolate Rice Krispie Treats: Drizzle melted chocolate over the cooled squares or sprinkle mini chocolate chips into the mixture after it has cooled slightly.
-
Peanut Butter Rice Krispie Treats: Stir ½ cup creamy peanut butter into the melted butter and marshmallows for a nutty flavor.
-
Funfetti Rice Krispie Treats: Fold ¼ cup colorful rainbow sprinkles into the mixture before transferring it to the pan.
-
Chocolate Peanut Butter: Add a chocolate drizzle and a light peanut butter swirl for a richer dessert.
-
Holiday Rice Krispie Treats: Add seasonal sprinkles in colors that match Christmas, Halloween, Valentine’s Day, or other celebrations.
Ingredient Substitutions
-
Salted butter: Use salted butter instead of unsalted butter and omit the additional salt.
-
Large marshmallows: Use approximately 40 regular marshmallows in place of 10 ounces of mini marshmallows. Melting may take slightly longer.
-
Vanilla extract: Almond extract can be used in a smaller amount for a different flavor, or simply leave out the extract.
-
Gluten-free crispy rice cereal: Choose a product specifically labeled gluten-free if needed. Not all crispy rice cereals are gluten-free.
What to Serve With Rice Krispie Treats
Homemade Rice Krispie Treats are sweet enough to enjoy on their own, but they also pair nicely with:
-
Cold milk: A classic pairing that balances the sweetness.
-
Fresh strawberries: Their light, fruity flavor complements the buttery marshmallow mixture.
-
Vanilla ice cream: Serve a square alongside a scoop for an easy dessert.
-
Fresh fruit salad: A refreshing option for parties and dessert tables.
-
Hot chocolate: A cozy pairing for colder days and holiday gatherings.
Storage & Reheating
Room temperature: Store Rice Krispie Treats in an airtight container at room temperature for 2–3 days. Separate layers with parchment paper to prevent sticking.
Refrigerator: Refrigeration isn’t recommended because the treats can become firm and lose their soft, chewy texture.
Freezer: For longer storage, wrap individual squares tightly in plastic wrap and place them in a freezer-safe container or bag. Freeze for up to 6 weeks for best quality.
Thawing: Let frozen treats thaw at room temperature before serving.
Reheating: These treats generally don’t need reheating. If they feel slightly firm, simply allow them to sit at room temperature for a little while before eating.
Frequently Asked Questions
1. Why are my homemade Rice Krispie Treats hard?
Hard Rice Krispie Treats are usually caused by overheating the marshmallows or pressing the cereal mixture too firmly into the pan. Melt the marshmallows over low heat and gently spread the mixture without compacting it.
2. Can I make Rice Krispie Treats without a microwave?
Yes! This recipe uses a saucepan on the stovetop, so you don’t need a microwave. Melt the butter and marshmallows over low heat, then mix in the cereal.
3. Can I use large marshmallows instead of mini marshmallows?
Yes. Approximately 40 regular marshmallows can replace a 10-ounce bag of mini marshmallows. They may take a little longer to melt, but the recipe will still work.
4. How do I keep Rice Krispie Treats soft and chewy?
Use fresh marshmallows, melt them gently, and avoid pressing the mixture too tightly into the pan. Store the finished squares in an airtight container to prevent them from drying out.
5. Can I make Rice Krispie Treats ahead of time?
Yes. You can make them a day ahead and store them in an airtight container at room temperature. For the best texture, serve them within 2–3 days.
6. Why are my Rice Krispie Treats falling apart?
The mixture may not have enough marshmallow to hold the cereal together, or the cereal may not have been evenly coated. Measure the ingredients carefully and fold the cereal thoroughly into the melted marshmallow mixture.
Final Thoughts
Homemade Rice Krispie Treats are a simple, nostalgic dessert that doesn’t require baking or a long list of ingredients. With buttery marshmallows, crispy rice cereal, and a few helpful techniques, you can make soft, chewy squares that are easy to share and customize.
Make a batch for your next gathering, or keep a few in an airtight container for an easy homemade snack.
Leave a Reply