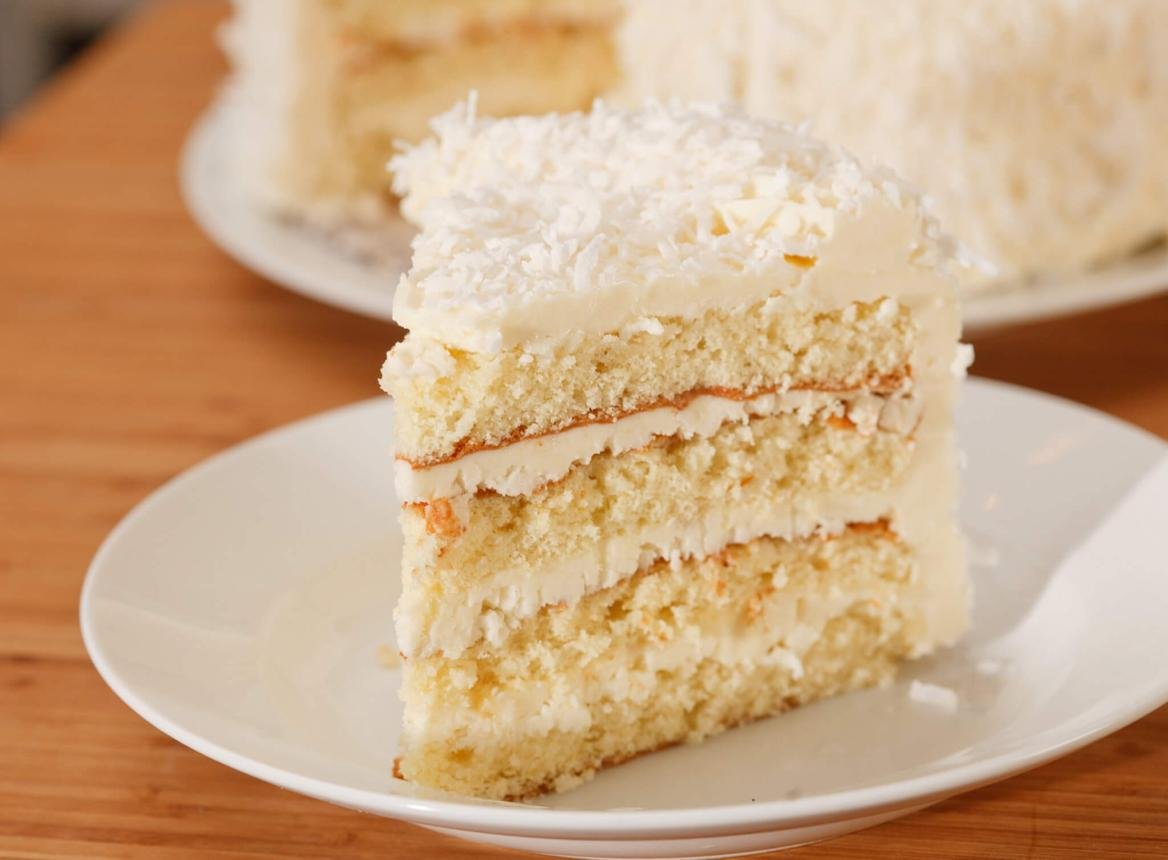
This homemade Coconut Cake features soft, buttery cake layers with a delicate coconut flavor, creamy coconut buttercream frosting, and plenty of sweet shredded coconut on the outside. Coconut milk and sour cream help create a tender, moist crumb, while a little coconut extract adds extra flavor without overpowering the cake.
It’s a lovely choice for Easter, birthdays, holidays, spring gatherings, or any occasion that calls for a homemade layer cake. Each slice has a light, fluffy texture and a creamy frosting that makes this classic dessert especially satisfying.
Recipe Overview
- Prep Time: 30 minutes
- Cook Time: 28–32 minutes
- Cooling Time: 1 hour
- Total Time: Approximately 2 hours
- Servings: 12 slices
- Difficulty: Moderate
Why You’ll Love This Recipe
- Soft and moist texture: Coconut milk and sour cream help keep the cake tender.
- Real coconut flavor: Coconut milk, coconut extract, and shredded coconut work together for a balanced flavor.
- Creamy frosting: Homemade coconut buttercream adds sweetness and richness without being overly complicated.
- Great for celebrations: Its pretty white frosting and coconut-covered exterior make it suitable for birthdays, holidays, and special occasions.
- Make-ahead friendly: The cake layers can be baked ahead of time and assembled when needed.
Ingredients
For the Coconut Cake
- 2½ cups (300g) all-purpose flour
- 2 teaspoons baking powder
- ½ teaspoon baking soda
- ½ teaspoon salt
- ¾ cup (170g) unsalted butter, softened
- 1¾ cups (350g) granulated sugar
- 4 large eggs, room temperature
- 1 teaspoon vanilla extract
- 1 teaspoon coconut extract
- 1 cup (240ml) canned coconut milk, well stirred
- ½ cup (120g) sour cream, room temperature
- ½ cup (40g) finely shredded sweetened coconut
For the Coconut Buttercream Frosting
- 1½ cups (340g) unsalted butter, softened
- 5 cups (600g) powdered sugar, sifted
- ¼ cup (60ml) canned coconut milk, plus more if needed
- 1 teaspoon coconut extract
- 1 teaspoon vanilla extract
- ¼ teaspoon salt
For Decorating
- 2 cups (160g) sweetened shredded coconut
Ingredient Notes
Coconut milk: Use canned, full-fat coconut milk rather than refrigerated coconut beverage. Stir it thoroughly before measuring because the cream and liquid can separate.
Coconut extract: This gives the cake a more noticeable coconut flavor. Use it sparingly so the flavor doesn’t become artificial or overpowering.
Sour cream: Adds moisture and a slight richness while helping create a soft cake crumb. Full-fat sour cream is recommended.
Shredded coconut: Sweetened shredded coconut works well for both the cake batter and decoration. Unsweetened coconut can also be used for a less sweet finish.
Unsalted butter: Softened butter is important for properly creaming the cake batter and making smooth frosting.
How to Make Coconut Cake
1. Prepare the Cake Pans
Preheat the oven to 350°F (175°C). Grease two 9-inch round cake pans and line their bottoms with parchment paper.
In a medium bowl, whisk together the flour, baking powder, baking soda, and salt. Set aside.
2. Cream the Butter and Sugar
In a large mixing bowl, beat the softened butter and granulated sugar with an electric mixer for approximately 3–4 minutes.
The mixture should become pale, light, and fluffy. This step incorporates air into the batter and helps create a tender cake.
3. Add the Eggs and Extracts
Add the eggs one at a time, beating after each addition until incorporated.
Mix in the vanilla extract and coconut extract. Scrape down the sides of the bowl to ensure everything is evenly combined.
4. Combine the Wet and Dry Ingredients
In a separate bowl, stir together the coconut milk and sour cream.
Add the flour mixture to the butter mixture in three additions, alternating with the coconut milk mixture in two additions. Begin and finish with the dry ingredients.
Mix on low speed just until combined. Fold in the shredded coconut gently. Avoid overmixing, as this can make the cake dense.
5. Bake the Cake Layers
Divide the batter evenly between the prepared cake pans and smooth the tops.
Bake for 28–32 minutes, or until the centers spring back lightly when touched and a toothpick inserted into the middle comes out clean or with a few moist crumbs.
Let the cakes cool in their pans for about 10 minutes before turning them onto wire racks. Remove the parchment paper and allow the layers to cool completely.
6. Make the Coconut Buttercream
Beat the softened butter in a large bowl for 2–3 minutes until smooth and creamy.
Gradually add the powdered sugar, mixing on low speed to prevent it from scattering. Add the coconut milk, coconut extract, vanilla extract, and salt.
Beat until fluffy and spreadable, approximately 2 minutes. If the frosting is too thick, add a little more coconut milk. If it becomes too soft, mix in additional powdered sugar.
7. Assemble and Decorate
Place one completely cooled cake layer on a serving plate or cake stand. Spread an even layer of frosting over the top.
Place the second cake layer on top. Cover the top and sides with the remaining buttercream.
Gently press shredded coconut onto the frosting, covering the entire cake. Refrigerate for about 20–30 minutes if you want the frosting to firm up before slicing.
Expert Tips
- Use room-temperature ingredients: Butter, eggs, and sour cream blend more evenly when they aren’t cold.
- Measure flour correctly: Spoon flour into your measuring cup and level it off rather than scooping directly from the bag.
- Don’t overmix: Once the flour is added, mix only until the ingredients are combined.
- Cool completely before frosting: Warm cake layers can soften the buttercream and cause it to slide.
- Use unsweetened coconut for less sweetness: If you prefer a less sugary cake, it works well as a decoration.
- Chill before slicing: A short refrigeration period helps the frosting hold its shape and makes cleaner slices.
Common Mistakes to Avoid
- Using coconut beverage instead of canned coconut milk: These products have different fat contents and can affect the cake’s texture.
- Adding too much coconut extract: Excessive extract can create an artificial flavor. Stick to the recommended amount.
- Frosting warm cake layers: Always allow the cake to cool completely.
- Overbaking: Check the cake near the end of the baking time. Leaving it in the oven too long can make the crumb dry.
- Skipping parchment paper: Greasing and lining the pans helps the cake layers release cleanly.
Easy Variations
- Coconut Pineapple Cake: Add a thin layer of well-drained crushed pineapple between the cake layers for a tropical variation.
- Toasted Coconut Cake: Toast some of the shredded coconut until lightly golden and use it to decorate the outside.
- Lemon Coconut Cake: Add 1 tablespoon of lemon zest to the batter for a fresh citrus note.
- Almond Coconut Cake: Replace the vanilla extract with a small amount of almond extract for a subtle almond flavor.
Ingredient Substitutions
- Sour cream: Plain full-fat Greek yogurt can be used in the same quantity. It may give the cake a slightly different tang.
- Coconut milk: Full-fat canned coconut milk is recommended. If unavailable, an unsweetened canned coconut cream diluted appropriately can be used, although the result may differ.
- Sweetened coconut: Unsweetened shredded coconut works well but produces a less sweet finish.
- Butter: Plant-based baking butter can be substituted, although the flavor and texture may change.
What to Serve With Coconut Cake
Coconut Cake is rich enough to enjoy on its own, but it also pairs nicely with:
- Fresh strawberries: Their mild tartness balances the sweet frosting.
- Fresh raspberries: Add a slightly tangy contrast to the coconut flavor.
- Fresh fruit salad: A light fruit side makes a nice addition to a dessert table.
- Coffee: Black coffee balances the sweetness of the buttercream.
- Hot tea: Lightly flavored tea complements the delicate coconut taste.
Storage & Reheating
Refrigerator: Store the frosted cake in an airtight cake container in the refrigerator for up to 4 days. Because the frosting contains butter, refrigeration is recommended.
Before serving: Allow individual slices to sit at room temperature for approximately 20–30 minutes. This softens the buttercream and improves the cake’s texture.
Freezing: Unfrosted cake layers can be wrapped individually in plastic wrap and placed in a freezer-safe container for up to 2 months. Thaw them in the refrigerator before assembling.
Frosted slices can also be frozen in a suitable airtight container. Thaw in the refrigerator before serving.
Reheating: This cake does not need reheating. Let it come closer to room temperature before serving instead.
Frequently Asked Questions
1. How do I keep Coconut Cake moist?
Use the recommended amount of coconut milk and sour cream, measure the flour carefully, and avoid overbaking. Store the cooled, frosted cake covered to prevent it from drying out.
2. Can I make Coconut Cake a day ahead?
Yes. You can bake the cake layers a day ahead, cool them completely, wrap them tightly, and refrigerate them. You can also assemble the cake the day before serving and keep it covered in the refrigerator.
3. Can I use unsweetened shredded coconut?
Yes. Unsweetened shredded coconut works in the batter and for decoration. The finished cake will have a slightly less sweet coconut flavor.
4. Why is my Coconut Cake dense?
Overmixing the batter, measuring too much flour, or using cold ingredients can contribute to a dense texture. Cream the butter and sugar properly and mix the dry ingredients gently.
5. Can I make this recipe in a 9 × 13-inch pan?
Yes. The batter can be baked in a greased and parchment-lined 9 × 13-inch pan. Begin checking around 30 minutes, but expect the baking time to vary depending on the pan and oven. Cool completely before frosting.
6. Can I use coconut cream instead of coconut milk?
Coconut cream is considerably thicker and richer than coconut milk. It is not a direct replacement in this recipe. Full-fat canned coconut milk is the better choice for the intended cake texture.
Final Thoughts
This Coconut Cake brings together soft, buttery layers, creamy coconut frosting, and a generous coating of shredded coconut. It’s a lovely homemade dessert for celebrations or an ordinary weekend baking project. Serve it with fresh berries or a cup of coffee for a simple, satisfying finish.
Leave a Reply