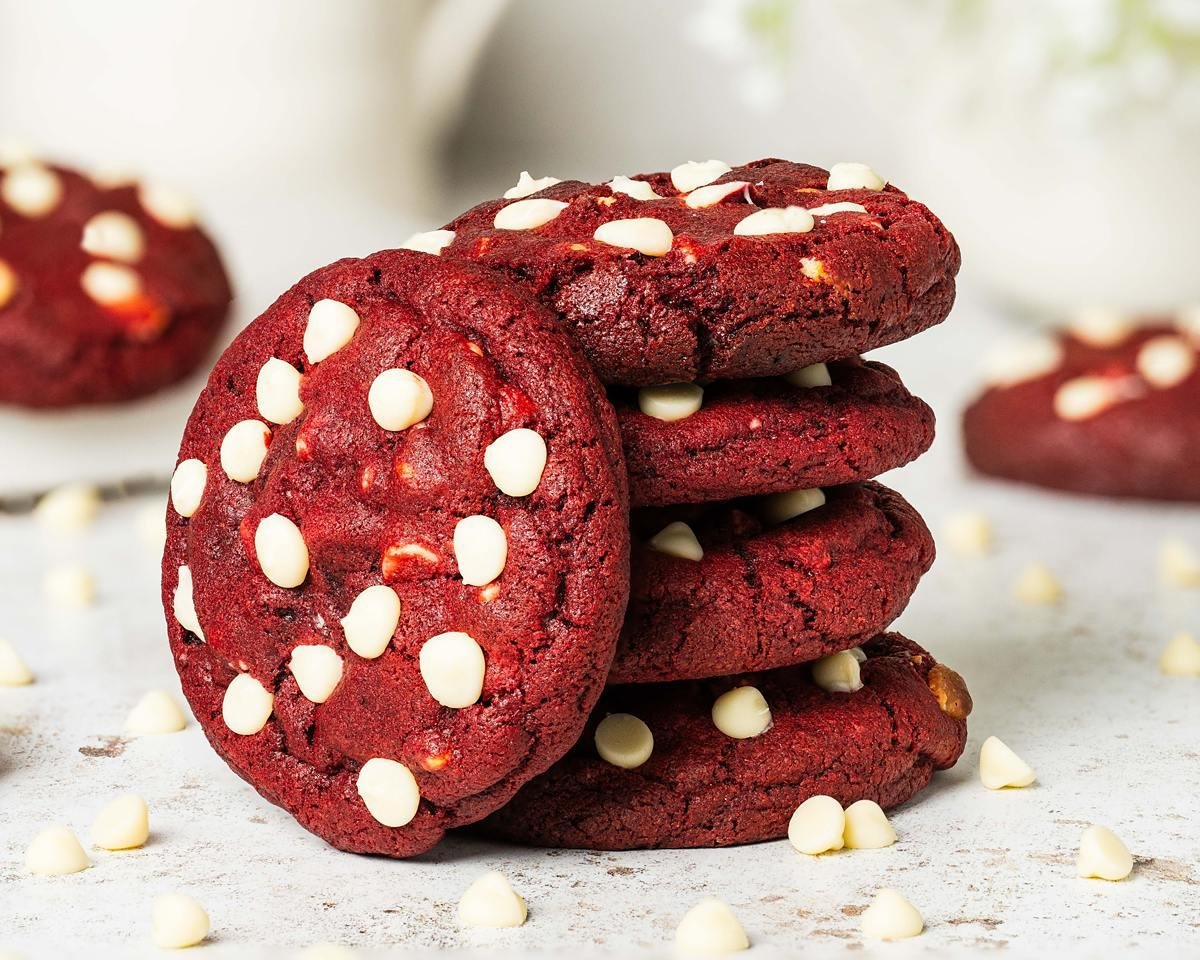
Red Velvet Cookies bring the familiar flavor of red velvet cake into a soft, chewy cookie. They have a beautiful deep-red color, a subtle cocoa flavor, a hint of vanilla, and creamy white chocolate chips in every bite.
These homemade red velvet cookies are easy to prepare with everyday baking ingredients and make a lovely addition to holiday cookie trays, Valentine’s Day treats, birthday celebrations, or an afternoon dessert. A short chilling period helps the cookies hold their shape while baking, leaving the centers soft and the edges lightly set.
Recipe Overview
| Details | Information |
|---|---|
| Prep Time | 15 minutes |
| Chill Time | 30 minutes |
| Cook Time | 11–13 minutes |
| Total Time | About 58 minutes |
| Servings | 14 cookies |
| Difficulty | Easy |
Why You’ll Love This Recipe
-
Soft and chewy texture: Brown sugar and properly chilled dough help create tender centers with lightly crisp edges.
-
Classic red velvet flavor: A little cocoa, vanilla, and buttermilk give the cookies their recognizable flavor.
-
Beautiful color: Red gel food coloring creates a rich red appearance without adding too much liquid.
-
White chocolate in every bite: Sweet white chocolate chips complement the mild cocoa flavor.
-
Easy to prepare: No complicated baking techniques or unusual ingredients are needed.
Ingredients
-
1¾ cups all-purpose flour (about 220 g)
-
2 tablespoons unsweetened natural cocoa powder
-
½ teaspoon baking soda
-
½ teaspoon baking powder
-
¼ teaspoon salt
-
½ cup unsalted butter, softened (1 stick)
-
½ cup packed light brown sugar
-
½ cup granulated sugar
-
1 large egg, room temperature
-
1½ teaspoons vanilla extract
-
1 tablespoon buttermilk
-
1–2 teaspoons red gel food coloring, adjusted for color intensity
-
1 teaspoon white vinegar
-
1 cup white chocolate chips
Ingredient Notes
Natural cocoa powder: Use unsweetened natural cocoa rather than Dutch-process cocoa. The mild chocolate flavor is what gives red velvet its characteristic taste without making the cookies taste like regular chocolate cookies.
Red gel food coloring: Gel coloring is concentrated, so a small amount produces a stronger color without thinning the dough. Liquid coloring can work, but you may need more of it.
Buttermilk: Adds a subtle tang that complements the cocoa and vanilla. Regular milk can be used if necessary, although the flavor will be slightly less tangy.
White chocolate chips: These add sweetness and creamy pockets throughout the cookies. Good-quality white chocolate chips or chopped white chocolate both work.
How to Make Red Velvet Cookies
1. Prepare the baking sheets. Preheat your oven to 350°F (175°C). Line two baking sheets with parchment paper and set aside.
2. Combine the dry ingredients. In a medium bowl, whisk together the flour, cocoa powder, baking soda, baking powder, and salt until evenly combined. Set aside.
3. Cream the butter and sugars. In a large mixing bowl, beat the softened butter, brown sugar, and granulated sugar for about 2–3 minutes until creamy and slightly fluffy.
4. Add the wet ingredients. Mix in the egg and vanilla extract. Add the buttermilk, vinegar, and red gel food coloring. Beat on low speed until the mixture has an even red color.
5. Make the cookie dough. Gradually add the dry ingredients to the wet mixture. Mix on low speed just until no large streaks of flour remain. Avoid overmixing, which can make the cookies tough.
6. Fold in the white chocolate. Use a spatula to gently fold the white chocolate chips into the dough. Reserve a few chips to decorate the tops if desired.
7. Chill the dough. Cover the bowl and refrigerate for 30 minutes. This helps firm the butter and reduces excessive spreading during baking.
8. Shape the cookies. Scoop approximately 2 tablespoons of dough per cookie. Roll into balls and place them about 2 inches apart on the prepared baking sheets. Press a few reserved chocolate chips onto the tops.
9. Bake. Bake for 11–13 minutes, or until the edges look set while the centers remain slightly soft. Avoid waiting for the centers to become completely firm in the oven.
10. Cool before serving. Leave the cookies on the baking sheet for 5 minutes before transferring them to a wire rack. They will continue to set as they cool.
Expert Tips
-
Measure flour using the spoon-and-level method. Too much flour can make the cookies dense and dry.
-
Make sure the butter is softened but not melted. Melted butter can cause excessive spreading.
-
Chill the dough before baking, especially if your kitchen is warm.
-
Mix the flour into the wet ingredients only until combined.
-
For attractive bakery-style cookies, press a few extra white chocolate chips onto the tops immediately after baking.
-
Bake one test cookie first if you’re unsure how your oven handles the dough.
Common Mistakes to Avoid
-
Skipping the chilling step: Warm dough may spread too much. Refrigerate it for at least 30 minutes.
-
Using too much food coloring: Excess liquid coloring can affect the dough consistency. Start with a small amount of gel coloring.
-
Overbaking: Cookies that look completely firm in the oven may become dry after cooling.
-
Adding too much flour: Always measure carefully rather than scooping directly from the flour container.
-
Overmixing: Once the flour disappears, stop mixing to maintain a tender texture.
Easy Variations
-
Cream cheese topping: Once the cookies have cooled completely, add a small amount of cream cheese frosting.
-
Chocolate chunk cookies: Replace half the white chocolate chips with semisweet chocolate chunks.
-
Red velvet sandwich cookies: Spread cream cheese frosting between two completely cooled cookies.
-
Festive cookies: Add a few red or white baking sprinkles before baking.
Ingredient Substitutions
-
Unsalted butter: Salted butter can be used; reduce or omit the added salt.
-
Buttermilk: Use regular milk if needed. The cookies will have slightly less tang.
-
White chocolate chips: Substitute chopped white chocolate or semisweet chocolate chips.
-
Red gel coloring: Liquid food coloring works, but use it sparingly to avoid changing the dough consistency.
-
All-purpose flour: A suitable 1:1 gluten-free baking flour blend may work, although the texture can vary by brand.
What to Serve With Red Velvet Cookies
These cookies pair nicely with:
-
A cold glass of milk for a classic cookie combination.
-
Hot coffee or a latte to balance their sweetness.
-
Hot chocolate for a cozy dessert.
-
Vanilla ice cream for a simple dessert plate.
-
Fresh strawberries or raspberries for a fruity contrast.
Storage & Reheating
Room temperature: Store completely cooled cookies in an airtight container for up to 3–4 days in a cool, dry place.
Refrigerator: If topped with cream cheese frosting, refrigerate them in an airtight container and follow the frosting’s food-safety storage requirements.
Freezer: Freeze unfrosted cookies in a freezer-safe container for up to 2 months. Separate layers with parchment paper.
Reheating: Warm an unfrosted cookie in the microwave for approximately 8–10 seconds to soften it slightly. Avoid overheating, as the white chocolate can become very hot.
Frequently Asked Questions
1. Why are my red velvet cookies spreading too much?
The butter may be too warm, or the dough may not have been chilled long enough. Measure the flour accurately and refrigerate the dough for 30 minutes before baking.
2. Can I make red velvet cookie dough ahead of time?
Yes. Cover the dough and refrigerate it for up to 24 hours. If it becomes very firm, let it sit briefly at room temperature before scooping.
3. Can I make these cookies without food coloring?
Yes. You can leave out the coloring entirely. The cookies will have a natural cocoa-brown color rather than the traditional red appearance.
4. Why are my cookies dry?
Too much flour or excessive baking time can make cookies dry. Measure flour carefully and remove the cookies when their edges are set but the centers still look slightly soft.
5. Can I freeze red velvet cookie dough?
Yes. Scoop the dough into individual portions and freeze them on a lined tray. Once firm, transfer them to a freezer-safe bag. Bake from frozen, adding a little extra baking time and checking for doneness.
6. Do red velvet cookies taste like chocolate cookies?
Not exactly. They have a mild cocoa flavor combined with vanilla and a slight tang. Their chocolate flavor is much more subtle than that of traditional chocolate cookies.
Final Thoughts
Red Velvet Cookies are a lovely way to enjoy the familiar flavor of red velvet cake in a simple homemade dessert. Their soft centers, gentle cocoa flavor, bright color, and white chocolate chips make them suitable for celebrations or everyday baking. Serve them freshly cooled with a glass of milk or package them in a cookie box for a thoughtful homemade treat.
Leave a Reply