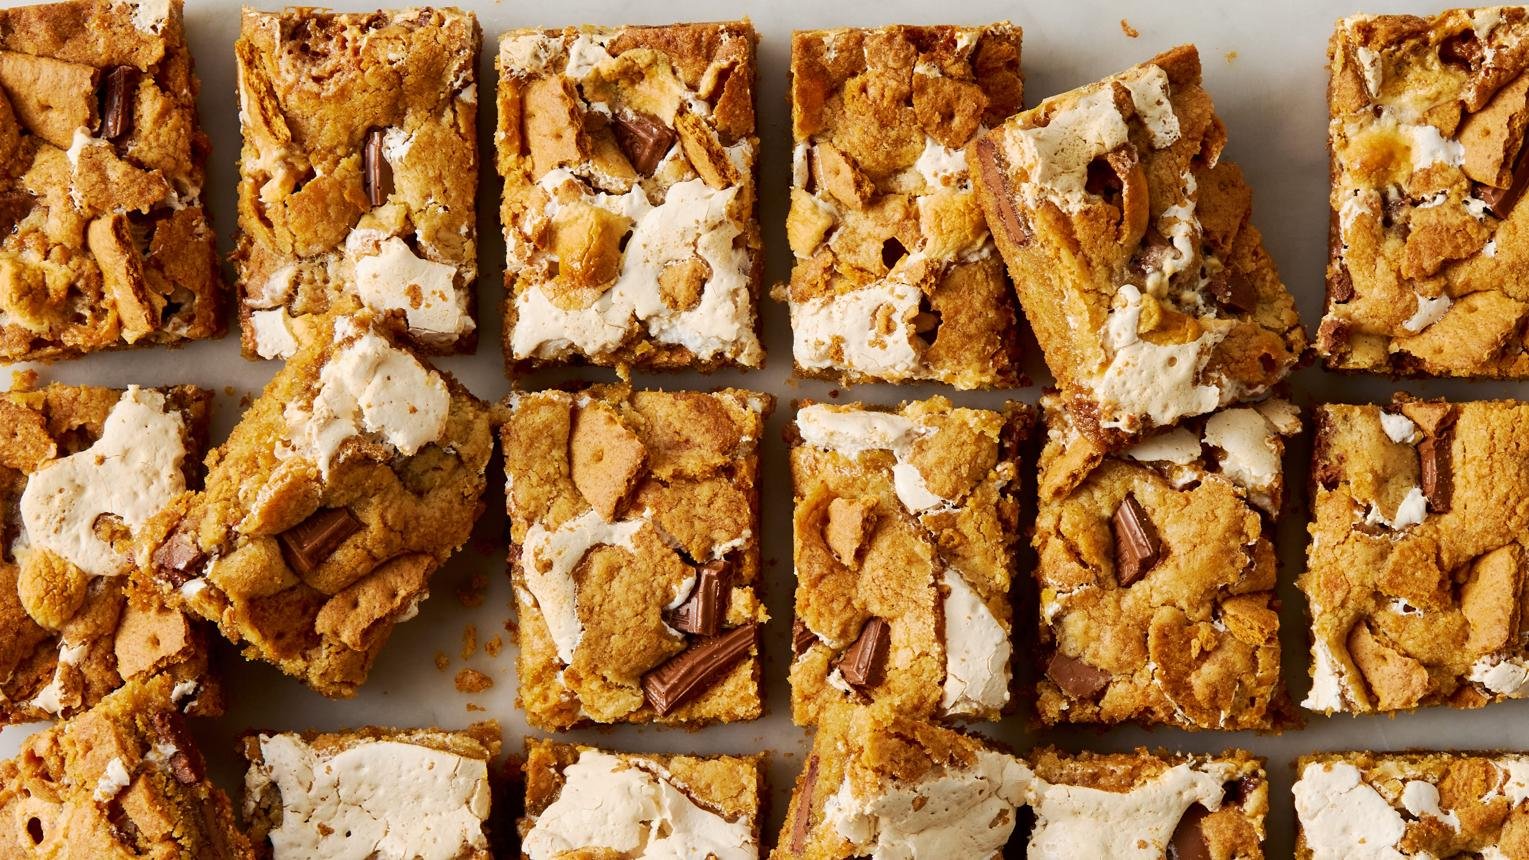
S’mores Bars bring the familiar combination of graham crackers, melted chocolate, and gooey marshmallows into an easy-to-slice dessert. Instead of assembling individual s’mores around a campfire, you can make everything together in one baking pan.
These homemade s’mores cookie bars have a buttery graham cracker base, layers of milk chocolate and marshmallow creme, and a golden graham cracker topping. They’re a great choice for summer gatherings, potlucks, bake sales, birthday parties, or whenever a chocolate-and-marshmallow dessert sounds appealing.
The best part? You can prepare them in advance and cut them into squares once they’ve cooled.
Recipe Overview
| Detail | Information |
|---|---|
| Prep Time | 15 minutes |
| Cook Time | 25–30 minutes |
| Cooling Time | 1 hour |
| Total Time | About 1 hour 45 minutes |
| Servings | 16 bars |
| Difficulty | Easy |
Why You’ll Love This Recipe
-
Classic s’mores flavor: Graham crackers, milk chocolate, and marshmallow come together in every bite.
-
Easy to share: One baking pan makes 16 convenient dessert bars.
-
No campfire required: Enjoy the familiar flavors of s’mores right from your kitchen.
-
Make-ahead friendly: Bake them ahead of a gathering and slice when ready to serve.
-
Great texture: The buttery cookie layers contrast with the soft chocolate and marshmallow center.
Ingredients
-
1½ cups all-purpose flour
-
1½ cups graham cracker crumbs
-
½ teaspoon baking powder
-
¼ teaspoon salt
-
¾ cup unsalted butter, softened
-
¾ cup packed light brown sugar
-
¼ cup granulated sugar
-
1 large egg
-
2 teaspoons vanilla extract
-
7–8 ounces milk chocolate bars, broken into pieces
-
1 cup marshmallow creme
Ingredient Notes
Graham cracker crumbs: Finely crushed graham crackers give the cookie layers their characteristic honey-like flavor. Measure the crumbs after crushing.
Milk chocolate: Classic milk chocolate bars provide the familiar flavor of traditional s’mores. Chocolate bars melt more evenly than large chocolate chips in this layered dessert.
Marshmallow creme: This creates a soft, gooey center. It is easier to spread than regular marshmallows and helps keep the filling in place.
Unsalted butter: Softened butter makes the cookie dough easier to mix and spread. It should be soft but not melted.
How to Make S’mores Bars
1. Prepare the baking pan. Preheat your oven to 350°F (175°C). Line an 8-inch square baking pan with parchment paper, leaving some overhang on the sides for easy removal.
2. Combine the dry ingredients. In a medium bowl, whisk together the flour, graham cracker crumbs, baking powder, and salt. Set aside.
3. Make the cookie dough. In a large mixing bowl, beat the softened butter, brown sugar, and granulated sugar until creamy. Add the egg and vanilla extract, mixing until combined. Gradually add the dry ingredients and mix just until a soft dough forms.
4. Create the bottom layer. Divide the dough into two portions, keeping slightly more than half for the bottom. Press it evenly into the prepared baking pan, making sure it reaches the corners.
5. Add the chocolate. Arrange the broken milk chocolate pieces over the cookie dough, covering most of the surface while leaving a small border around the edges.
6. Spread the marshmallow creme. Carefully spoon the marshmallow creme over the chocolate. Use a lightly greased spatula to spread it into an even layer without disturbing the chocolate too much.
7. Add the top layer. Flatten small portions of the remaining dough between your fingers and gently place them over the marshmallow layer. The filling does not need to be completely covered; a few small gaps are fine.
8. Bake the bars. Bake for 25–30 minutes, until the top is lightly golden and the edges look set. The center may still feel slightly soft, which is normal.
9. Cool and slice. Allow the bars to cool completely in the pan for at least 1 hour. Lift them out using the parchment paper and cut into 16 squares with a sharp knife.
Expert Tips
-
Use parchment paper: The marshmallow filling can become sticky, so parchment makes removing the bars much easier.
-
Avoid overmixing: Once the flour mixture is incorporated, stop mixing to keep the cookie layers tender.
-
Spread carefully: Marshmallow creme is sticky. A lightly greased spatula makes it easier to distribute.
-
Let them cool completely: Cutting too early can cause the chocolate and marshmallow layers to shift.
-
Clean your knife: Wipe the blade between cuts for neater squares.
Common Mistakes to Avoid
-
Using melted butter: This changes the consistency of the dough and can make the bars greasy.
-
Adding too much marshmallow creme: Excess filling can make the center overly sticky and difficult to slice.
-
Overbaking: Baking until the entire center feels firm can result in dry cookie layers.
-
Slicing while warm: The filling needs time to settle before cutting.
Easy Variations
-
Dark Chocolate S’mores Bars: Replace milk chocolate with semisweet or dark chocolate.
-
Peanut Butter S’mores Bars: Add a thin layer of creamy peanut butter over the chocolate.
-
Chocolate Chip Version: Replace some of the chocolate bar pieces with semisweet chocolate chips.
-
Extra Graham Flavor: Sprinkle a little crushed graham cracker over the top before baking.
Ingredient Substitutions
-
Butter: Salted butter can replace unsalted butter. Reduce or omit the added salt.
-
Marshmallow creme: Marshmallow fluff works as a direct alternative.
-
Milk chocolate: Semisweet chocolate or chocolate chunks can be used, although the sweetness will change.
-
Graham crackers: Digestive biscuits can work as a substitute, but their flavor is slightly different.
What to Serve With S’mores Bars
These bars are rich and sweet, so simple accompaniments work best.
-
Vanilla ice cream: A cool, creamy contrast to the chocolate filling.
-
Fresh strawberries: Their slight tartness balances the sweetness.
-
Cold milk: A classic pairing with chocolate-based desserts.
-
Fresh coffee: The slightly bitter flavor complements the sweet marshmallow and chocolate.
Storage & Reheating
Room temperature: Store completely cooled bars in an airtight container for up to 3 days in a cool environment.
Refrigerator: Refrigerate in an airtight container for up to 5 days if your kitchen is warm. Allow the bars to come closer to room temperature before serving for a softer texture.
Freezer: Wrap individual bars tightly and store in a freezer-safe container for up to 2 months. Thaw in the refrigerator or at room temperature.
Reheating: Warm an individual bar in the microwave for approximately 8–10 seconds if you want a softer chocolate and marshmallow center. Avoid overheating, as marshmallow creme can become very sticky.
Frequently Asked Questions
1. Can I make s’mores bars without a campfire?
Yes! These bars are baked in the oven, so you can enjoy the classic graham cracker, chocolate, and marshmallow combination without a campfire.
2. Why are my s’mores bars difficult to cut?
The chocolate and marshmallow filling can be sticky, especially while warm. Let the bars cool completely before slicing and wipe your knife between cuts.
3. Can I use regular marshmallows instead of marshmallow creme?
Marshmallow creme is recommended for this recipe because it spreads evenly. Regular marshmallows may create a different filling texture and can be harder to layer.
4. Can I make these bars ahead of time?
Absolutely. Bake them a day ahead, allow them to cool completely, and store them in an airtight container. Slice before serving.
5. Do I need to refrigerate s’mores bars?
Not necessarily if your kitchen is cool. An airtight container at room temperature is suitable for short-term storage. Refrigeration is helpful in warmer conditions.
6. How do I know when the bars are done baking?
Look for lightly golden edges and a set top. The center can remain slightly soft because the chocolate and marshmallow filling will firm up as the bars cool.
Final Thoughts
S’mores Bars are a simple way to turn a familiar campfire treat into a shareable homemade dessert. With buttery graham cracker cookie layers, creamy marshmallow filling, and melted milk chocolate, they’re easy to prepare and convenient for parties, potlucks, and family dessert tables.
Leave a Reply